TwitterClone: Getting Started with the Development of a Django Web Application and its Deployment to Heroku
This is TwitterCLONE, a simple Twitter clone made using Django framework in Python.
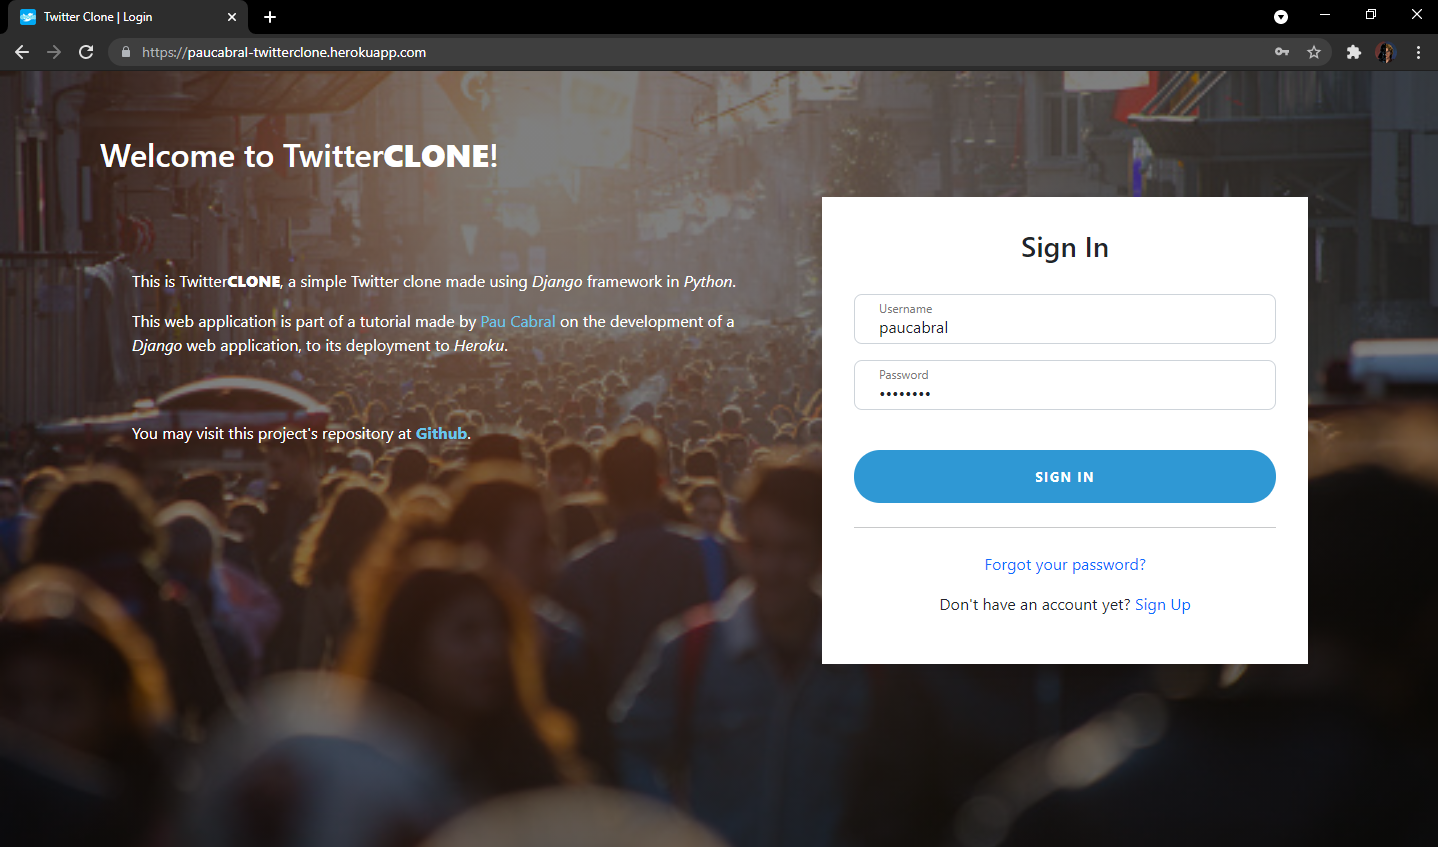
As seen on https://paucabral-twitterclone.herokuapp.com/.
This tutorial tackles the development of a Django web application up to its deployment to Heroku.
Check out this project’s repository at Github.
Setting up the local machine
- Install the latest version of Python and Git.
- In a command line, check if
pipwas installed.$ pip --versionNote: For Windows users, you may need to add
pipinto your PATH from the environmental variables. - Install the
virtualenvwrapperusingpip. This would allow us to create a virtual environment for our project.
For Windows:$ pip install virtualenvwrapper-winFor Linux/UNIX:
$ pip install virtualenvwrapper
Setting up the environment and Django
- Create a virtual environment to be used for the project. This will make an isolated Python environment free of other libraries and packages. You may name it as you desire.
$ mkvirtualenv twtcloneNote: In this case, the name of the environment was set to “twtclone”.
- You should notice that the your terminal now has a modified prompt which looks like the following:
(twtclone)$Note: After exiting your terminal, the virtual environment would naturally be deactivated upon your next launch or a spawn of another terminal. You do not need to recreate the virtual environment for the project everytime. Instead, you may use the created virtual environment again using the following command:
$ workon twtclone - Install Django using
pip.(twtclone)$ pip install django - Once installed, you may issue the
django-admincommand to check. You should see a list of commands that can be issued.(twtclone)$ django-admin -
Create your project using the following command.
(twtclone)$ django-admin startproject twittercloneNote: In this case, the name of the project was twitterclone. General rule for naming convention is to ensure that the name has no spaces nor non-alphanumeric characters.
The directory of your project should now look similar to one below:
twitterclone/ |__ twitterclone/ | |__ __pycache__/ | |__ __init__.py | |__ asgi.py | |__ settings.py | |__ urls.py | |__ wsgi.py |__ db.sqlite3 |__ manage.py -
Run the server using the following command:
(twtclone)$ python manage.py runserverYou should be able to access the page on your web browser at http://127.0.0.1:8000. You may stop serving it using
Ctrl + C.
Setup .env file for environmental variables
- To properly integrate environmental variables in a Django project, additional dependency must be installed. Using
pip, installpython-decouple.(twtclone)$ pip install python-decouple -
Inside your project directory, enter the subdirectory (
twitterclone/twitterclone) and create a.envfile. For now, add the following lines.twitterclone/twitterclone/.env
SECRET_KEY= - Open
settings.pyfrom inside the project subdirectory. -
Just below the
from from pathlib import Pathline, importconfigfrom thedecouplelibrary.twitterclone/twitterclone/settings.py
from pathlib import Path from decouple import config # Insert the code here. - Copy the value of the variable
SECRET_KEY.SECRET_KEY = 'django-insecure-i&n$0x7e_(4jeo&!tbfq\%*yk(t-486lt^nnrzqay9+2odd(y#p' - Paste the value to the
SECRET_KEYvariable in the.envfile.SECRET_KEY=django-insecure-i&n$0x7e_(4jeo&!tbfq\%*yk(t-486lt^nnrzqay9+2odd(y#pNote: Make sure that there are no spaces in between the variable name, equal sign, and the value itself.
- Go back to the
settings.pyfile and replace the value ofSECRET_KEYby referencing the environmental variable assigned to it using theconfigfunction from thedecouplelibrary.SECRET_KEY = config('SECRET_KEY') - Go ahead as well on modifying the
DEBUGvariable.
settings.pyDEBUG = config('DEBUG', default=True, cast=bool).env
DEBUG=TrueNote: During development, always set
DEBUGtoTrueto see debug messages. Set it only toFalsewhen testing or deploying for production. -
Try to run the server again. You should not experience any problem.
(twtclone)$ python manage.py runserverThe updated path of your project should look similar to one below:
twitterclone/
|__ twitterclone/
|   |__ __pycache__/
|   |__ __init__.py
|   |__ .env
|   |__ asgi.py
|   |__ settings.py
|   |__ urls.py
|   |__ wsgi.py
|__ db.sqlite3
|__ manage.py
Setting up the repository
- Create a new repository from your Github account.
Note: Make sure to intialize an empty repository. - Go inside the directory of your Django project.
$ cd /path/to/project/repository/ - Initalize the repository from your local machine.
$ git init -
Before proceeding with the development, setup a
.gitignorefile on the root directory of the project (same directory as themanage.pyfile) with the following lines inside (this will keep the unecessary files, along with files containing sensitive information, from being tracked and pushed to both our local and remote repository):.env *.log *.pot *.pyc __pycache__/ local_settings.py db.sqlite3 db.sqlite3-journal mediaThe updated path of your project locally should look similar to one below:
twitterclone/ |__ twitterclone/ | |__ __pycache__/ | |__ __init__.py | |__ .env | |__ asgi.py | |__ settings.py | |__ urls.py | |__ wsgi.py |__ .gitignore |__ db.sqlite3 |__ manage.py - Track the files and do an an intial commit.
$ git add . $ git commit -m "Intialized repository with Django project." - Configure remote origin as the Github repository your created.
$ git branch -M main $ git remote add origin https://github.com/<your-github-user>/<your-repository>.git - Push the project the
mainbranch for now. You should see the files in themainbranch of your Github project repository except those declared inside.gitignore.$ git push -u origin mainSince some files are included in
.gitignore, the updated path to your remote project repository should look similar to the one below instead:twitterclone/ |__ twitterclone/ | |__ __init__.py | |__ asgi.py | |__ settings.py | |__ urls.py | |__ wsgi.py |__ .gitignore |__ manage.py - Create a new branch named
developmentand switch to it using thegit checkoutcommand. This will be your dedicated branch during active development. You may add, commit, and push to this branch during the course of the development.$ git branch development $ git checkout development
Creating Apps
In Django, apps can be used to manage multiple pages with specific features. In this project, we will be adding the apps: accounts and tweets.
- In the root project directory (
twitterclone/), create the accounts app using the following command:(twtclone)$ python manage.py startapp accounts -
Open the
settings.pyand addaccountson the list ofINSTALLED_APPS.# Application definition INSTALLED_APPS = [ 'django.contrib.admin', 'django.contrib.auth', 'django.contrib.contenttypes', 'django.contrib.sessions', 'django.contrib.messages', 'django.contrib.staticfiles', 'accounts', # Add the accounts app on the list of installed apps ] - You may proceed as well on creating the tweets app with the following command:
(twtclone)$ python manage.py startapp tweets - Likewise, add
tweetsas well on the list ofINSTALLED_APPSinsidesettings.py.INSTALLED_APPS = [ 'django.contrib.admin', 'django.contrib.auth', 'django.contrib.contenttypes', 'django.contrib.sessions', 'django.contrib.messages', 'django.contrib.staticfiles', 'accounts', 'tweets', # Add the tweets app on the list of installed apps ] -
Your local directory structure should now look similar to the one below:
twitterclone/
|__ accounts/
|   |__ __pycache__/
|   |__ migrations/
|   |__ __init__.py
|   |__ admin.py
|   |__ apps.py
|   |__ models.py
|   |__ tests.py
|   |__ views.py
|__ tweets/
|   |__ __pycache__/
|   |__ migrations/
|   |__ __init__.py
|   |__ admin.py
|   |__ apps.py
|   |__ models.py
|   |__ tests.py
|   |__ views.py
|__ twitterclone/
|   |__ __pycache__/
|   |__ __init__.py
|   |__ .env
|   |__ asgi.py
|   |__ settings.py
|   |__ urls.py
|   |__ wsgi.py
|__ .gitignore
|__ db.sqlite3
|__ manage.py
Creating a super user account and exploring the Admin Panel
Django lets us create a super user account which has direct access to the built-in Admin Panel. It can be used to check and modify the entries in the connected database (for now, we are using the default SQLite database generated by Django), as well as other features such modifying user accounts.
- To start, we need to do an initial migration. Inside the root project directory, run the following command:
(twtclone)$ python manage.py migrate -
After the built-in Django models are migrated, you may now proceed on creating a supersuser using the command below. Simply follow each prompt and provide the necessary information.
(twtclone)$ python manage.py createsuperuser - Run your project and you may now explore the admin panel at http://127.0.0.1:8000/admin using the account you just created.
(twtclone)$ python manage.py runserver
Creating preliminary views and associating each app with specific URL patterns
URL patterns set the paths to which each app or specific functionality can be accessed as a webpage.
- Open your base
urls.py(in the same directory astwitterclone/twitterclone). -
Open the accounts subdirectory (
twitterclone/accounts/) and create a file namedurls.py.
Your local directory structure should now look similar to the one below:twitterclone/ |__ accounts/ | |__ __pycache__/ | |__ migrations/ | |__ __init__.py | |__ admin.py | |__ apps.py | |__ models.py | |__ tests.py | |__ urls.py | |__ views.py |__ tweets/ | |__ __pycache__/ | |__ migrations/ | |__ __init__.py | |__ admin.py | |__ apps.py | |__ models.py | |__ tests.py | |__ views.py |__ twitterclone/ | |__ __pycache__/ | |__ __init__.py | |__ .env | |__ asgi.py | |__ settings.py | |__ urls.py | |__ wsgi.py |__ .gitignore |__ db.sqlite3 |__ manage.py -
Open the
views.pyinside the accounts subdirectory and set the prelimnary views. The views are basically dedicated classes or functions which serve as the backend for the functionalities found in a specific Django webpage. In this case, we will be using class based views. Simpy follow the code below for now. There are some commented explanations on the added lines as well.from django.shortcuts import render from django.views import View # import the class View from Django library from django.http import HttpResponse # import the HttpResponse from Django library # Create your views here. class Login(View): # Created a Login ckass inherting the View class from the Django library def get(self, request, *args, **kwargs): # The get function is the dedicated backend for handling GET requests on a URL. GET requests are made when data is meant to be gathered and displayed in a webpage. return HttpResponse('login') # render the text: login upon get request. def post(self, request, *args, **kwargs): # The post function on the other hand handles the POST requests on a URL. POST requests are made when data is meant to sent or submitted to backend for processing or storing. pass # we will leave this empty for now -
Open your previously created
urls.pyfile and follow the code below. There are commented explanations below as well.from django.urls import path # import path to set URL paths from . import views # import all the views inside the views.py for the accounts app urlpatterns = [ path('', views.Login.as_view(), name='login'), # the path '/' or the root path was used as the path to locate the Login page. ] -
The URL however, is still not accessible since it still not connected from the main
urls.pyin the base application. Update theurlpatternsin the baseurls.py(twitterclone/twitterclone/settings.py) and add'/'as the dedicated path for accounts app since we want the pages contained here (i.e. the landing/login page) to be accessed from the root URL. You may follow the code below and check the commented explanations for the added lines.from django.contrib import admin from django.urls import path, include # import the necessary code to include urlpatterns from other apps. urlpatterns = [ path('admin/', admin.site.urls), path('', include('accounts.urls')), # append the url patterns from accounts app to the base path. This way, all URL patterns can be accessible starting from the base url. ] - Now, the
'/'directory can be viewed after running the project again. You should now see a new content when visiting http://127.0.0.1:8000/.(twtclone)$ python manage.py runserver -
Proceed on doing the same steps for the tweets app. This time however, the tweet app views and all its URL is meant to be accessible in
/tweetsdirectory. For now create a view dedicated to view all tweets with a class namedAllTweets. Proceed on creating aurls.pyfor it as well.twitterclone/tweets/views.py.
from django.shortcuts import render from django.views import View from django.http import HttpResponse # Create your views here. class AllTweets(View): def get(self, request, *args, **kwargs): return HttpResponse('This is page dedicated to view all tweets.') def post(self, request, *args, **kwargs): passtwitterclone/tweets/urls.py.
from django.urls import path from . import views urlpatterns = [ path('all-tweets', views.AllTweets.as_view(), name='all-tweets'), ]twitterclone/twitterclone/urls.py.
from django.contrib import admin
from django.urls import path, include

urlpatterns = [
   path('admin/', admin.site.urls),
   path('', include('accounts.urls')),
   path('tweets/', include('tweets.urls')), # add the urlpatterns declared from the tweets app
]
In this case, the dedicated URL path for all the URLs in the tweets app was set to
'tweets/'and the correspondingAllTweetsview can be found on the URL'tweets/all-tweets'. You may run the project again and visit the newly created webpage at http://127.0.0.1/tweets/all-tweets/.(twtclone)$ python manage.py runserverYour updated local directory structure should look similar to this.
twitterclone/
|__ accounts/
|   |__ __pycache__/
|   |__ migrations/
|   |__ __init__.py
|   |__ admin.py
|   |__ apps.py
|   |__ models.py
|   |__ tests.py
|   |__ urls.py
|   |__ views.py
|__ tweets/
|   |__ __pycache__/
|   |__ migrations/
|   |__ __init__.py
|   |__ admin.py
|   |__ apps.py
|   |__ models.py
|   |__ tests.py
|   |__ urls.py
|   |__ views.py
|__ twitterclone/
|   |__ __pycache__/
|   |__ __init__.py
|   |__ .env
|   |__ asgi.py
|   |__ settings.py
|   |__ urls.py
|   |__ wsgi.py
|__ .gitignore
|__ db.sqlite3
|__ manage.py
Creating models
Models are basically the representation of databases in Django. Models can be used to define database schema, as well as to add, delete, or modify entries in a database. In this example, we will be creating a model for the profile information of users.
- Inside the accounts app directory (
twitterclone/accounts), open the filemodels.py. -
Simply add the following lines of code after the
# Create your models here.comment. This will create a new table dedicated for the Profile of the users.class Profile(models.Model): first_name = models.CharField(max_length=200, null=True) last_name = models.CharField(max_length=200, null=True) username = models.CharField(max_length=200, null=True) email = models.CharField(max_length=200, null=True) date_created = models.DateTimeField(auto_now_add=True, null=True) def __str__(self): return self.username - To fully create the model, it needs to be migrated to the database. Run the command below to make the migration.
(twtclone)$ python manage.py makemigrations -
Afterwards, run the migrate command again to fully construct the changes to the database.
(twtclone)$ python manage.py migrate -
To manage the newly created table from the Admin Panel, open the
admin.pyfile of the accounts app and add the following lines of code after the comment#Register your models here:from .models import * # imports all models in accounts app admin.site.register(Profile) -
You may now check that a new table was added by visiting the Admin Panel at http://127.0.0.1:8000/admin.
(twtclone)$ python manage.py runserverNote: You may use third-party tools as well such as SQLite Studio to view the contents and observer the changes of the database from the
db.sqlite3file, found in the root project directory (twitterclone/db.sqlite3).
Templates, inheritance, and static files
Templates are basically the frontend component of a basic Django project. It is where the corresponding HTML files are placed and referenced by the views.
- Create a templates directory inside an app subdirectory. In this case, a new directory
templatesis created inside the accounts app (twitterclone/accounts). -
Inside the
templatesdirectory, create another directory with the same name as the corresponding app. In this case, create anaccountsdirectory inside the newly createdtemplatesdirectory.Your updated local directory structure should look similar to this.
twitterclone/ |__ accounts/ | |__ __pycache__/ | |__ migrations/ | |__ accounts/ | |__ templates/ | |__ __init__.py | |__ admin.py | |__ apps.py | |__ models.py | |__ tests.py | |__ urls.py | |__ views.py |__ tweets/ | |__ __pycache__/ | |__ migrations/ | |__ __init__.py | |__ admin.py | |__ apps.py | |__ models.py | |__ tests.py | |__ urls.py | |__ views.py |__ twitterclone/ | |__ __pycache__/ | |__ __init__.py | |__ .env | |__ asgi.py | |__ settings.py | |__ urls.py | |__ wsgi.py |__ .gitignore |__ db.sqlite3 |__ manage.py -
One great feature of Django is the ability to set a base template which can be inherited by other HTML files. This way, particular HTML code can be reused (i.e. for headers, navbar, footers, etc.). For now, we will create a
base.htmlas template for all the HTML files in our accounts app. Create abase.htmlfile inside thetwitterclone/accounts/templates/accountsdirectory. We may import within it an external CSS library as well like bootstrap. For the mean time, add the following contents inside:<!DOCTYPE html> <html lang="en"> <head> <meta charset="utf-8" /> <meta http-equiv="X-UA-Compatible" content="IE=edge" /> <meta name="viewport" content="width=device-width, initial-scale=1" /> <title>{% block title %}{% endblock %}</title> <link href="https://cdn.jsdelivr.net/npm/bootstrap@5.0.2/dist/css/bootstrap.min.css" rel="stylesheet" integrity="sha384-EVSTQN3/azprG1Anm3QDgpJLIm9Nao0Yz1ztcQTwFspd3yD65VohhpuuCOmLASjC" crossorigin="anonymous" /> </head> <body> <div class="container">{% block content %} {% endblock %}</div> </body> </html> -
Along with the external CSS refrences, we can also setup our local CSS on a dedicated stylesheet/s by serving them as static files. In the root project directory (
twitterclone/) createstaticdirectory and place another set of directories forcss,img, andjs. This is where we will serve our own CSS, static images, and separate Javascript file/s if needed.Your updated local directory structure should look similar to this.
twitterclone/ |__ accounts/ | |__ __pycache__/ | |__ migrations/ | |__ accounts/ | |__ templates/ | |__ __init__.py | |__ admin.py | |__ apps.py | |__ models.py | |__ tests.py | |__ urls.py | |__ views.py |__ static/ | |__ css/ | |__ img/ | |__ js/ |__ tweets/ | |__ __pycache__/ | |__ migrations/ | |__ __init__.py | |__ admin.py | |__ apps.py | |__ models.py | |__ tests.py | |__ urls.py | |__ views.py |__ twitterclone/ | |__ __pycache__/ | |__ __init__.py | |__ .env | |__ asgi.py | |__ settings.py | |__ urls.py | |__ wsgi.py |__ .gitignore |__ db.sqlite3 |__ manage.py -
For now add
index.cssfile inside thecssdirectory and add the following contents below. This will be our dedicated stylesheet for the project.twitterclone/static/css/index.css
body {
  background-color: rgb(194, 218, 235);
}

.brand {
  font-weight: 1000;
}
Your updated local directory structure should look similar to this.
twitterclone/ |__ accounts/ | |__ __pycache__/ | |__ migrations/ | |__ accounts/ | |__ templates/ | |__ __init__.py | |__ admin.py | |__ apps.py | |__ models.py | |__ tests.py | |__ urls.py | |__ views.py |__ static/ | |__ css/ | |__ index.css | |__ img/ | |__ js/ |__ tweets/ | |__ __pycache__/ | |__ migrations/ | |__ __init__.py | |__ admin.py | |__ apps.py | |__ models.py | |__ tests.py | |__ urls.py | |__ views.py |__ twitterclone/ | |__ __pycache__/ | |__ __init__.py | |__ .env | |__ asgi.py | |__ settings.py | |__ urls.py | |__ wsgi.py |__ .gitignore |__ db.sqlite3 |__ manage.py -
To be able to serve static files however, there are lines of code to be added to
settings.py. Import theosmodule and add the following lines of code to define the location of CSS files.twitterclone/twitterclone/settings.py
import os # put at the top just above "from pathlib import Path" ... STATIC_DIR = os.path.join(BASE_DIR, "static") STATIC_URL = '/static/' # This variable already exists, just add the remaining lines of code. STATIC_ROOT = 'staticfiles' STATICFILES_DIRS = [ STATIC_DIR, ] -
Open the base
urls.pyas well and add the necessary import to serve static files. Your updatedurls.pyand add the following line.twitterclone/twitterclone/urls.py
from django.conf.urls.static import static - Import the
index.cssfile in thebase.htmlfile by adding the{% load static %}invocation and referencing it with the<link>tag. You may follow the updatedbase.htmlcode below:{% load static %} <!-- Initiate loading of static files --> <!DOCTYPE html> <html lang="en"> <head> <meta charset="utf-8" /> <meta http-equiv="X-UA-Compatible" content="IE=edge" /> <meta name="viewport" content="width=device-width, initial-scale=1" /> <title>{% block title %}{% endblock %}</title> <link href="https://cdn.jsdelivr.net/npm/bootstrap@5.0.2/dist/css/bootstrap.min.css" rel="stylesheet" integrity="sha384-EVSTQN3/azprG1Anm3QDgpJLIm9Nao0Yz1ztcQTwFspd3yD65VohhpuuCOmLASjC" crossorigin="anonymous" /> <link rel="stylesheet" type="text/css" href="{% static 'css/index.css' %}" /> <!-- Import the created CSS file --> </head> <body> <div class="container">{% block content %} {% endblock %}</div> </body> </html> -
This time, let’s create a dedicated HTML file which we will bind for the Login view. We will be extending the contents of
base.htmlto this file so that the we do not have to rewrite the code we have written inside thebase.html. Createlogin.htmlinside the accounts template directory (twitterclone/accounts/templates/accounts/).twitterclone/accounts/templates/accounts/login.html
{% extends 'accounts/base.html' %}
{% load static %}

{% block title %}
Twitter Clone | Login
{% endblock %}

{% block content %}
<div>
  <h1 class="brand">Twitter Clone</h1>
  <h1>Login</h1>
</div>
{% endblock %}
Note: The document title is placed in between the block title blocks and the content which was initialized at the
<body>tag is placed in between the block content blocks. -
We will now connect this HTML file to the Login view inside the
views.pyof our accounts app. Modify thegetfunction and return a render instead. You may simply follow the code below.from django.shortcuts import render from django.views import View from django.http import HttpResponse # Create your views here. class Login(View): def get(self, request, *args, **kwargs): return render(request, template_name='accounts/login.html', context={}) # Render the HTML page upon get request by updating the return value to this line. def post(self, request, *args, **kwargs): pass -
Try running the project again and visit the Login page at http://127.0.0.1:8000/. We will update this page and other views for the accounts app later.
(twtclone)$ python manage.py runserver
Displaying “tweets” in the tweets app
This app is dedicated for viewing and posting tweets. For now, we will be adding the functionality to dynamically view the latest “tweets” based on the entry from the database.
-
Start by creating a templates directory and adding a
base.htmlfile with the following contents below. We will be placing a basic navbar in the base template as well. Placing the navbar on the base template will allow it to appear in the rest of the tweets app templates (or templates from other apps as well) as long as the extends block is indicated. Update the contents ofindex.cssas well to correspond with the changes.twitterclone/tweets/templates/tweets/base.html
{% load static %}
<!DOCTYPE html>
<html lang="en">
  <head>
    <meta charset="utf-8" />
    <meta http-equiv="X-UA-Compatible" content="IE=edge" />
    <meta name="viewport" content="width=device-width, initial-scale=1" />

    <title>{% block title %}{% endblock %}</title>

    <link
      href="https://cdn.jsdelivr.net/npm/bootstrap@5.0.2/dist/css/bootstrap.min.css"
      rel="stylesheet"
      integrity="sha384-EVSTQN3/azprG1Anm3QDgpJLIm9Nao0Yz1ztcQTwFspd3yD65VohhpuuCOmLASjC"
      crossorigin="anonymous"
    />
    <link
      rel="stylesheet"
      href="https://cdnjs.cloudflare.com/ajax/libs/font-awesome/4.7.0/css/font-awesome.css"
    />
    <link
      rel="stylesheet"
      type="text/css"
      href="{% static 'css/index.css' %}"
    />
  </head>

  <body>
    <header class="navigationHeader sticky-top">
      <nav
        class="navbar navbar-expand-lg navbar-dark bg-primary container-fluid"
      >
        <div class="container">
          <a class="navbar-brand navBrand" href="#"
            >Twitter<span class="brand">CLONE</span></a
          >
          <button
            class="navbar-toggler"
            type="button"
            data-toggle="collapse"
            data-target="#navbarTogglerDemo02"
            aria-controls="navbarTogglerDemo02"
            aria-expanded="false"
            aria-label="Toggle navigation"
          >
            <span class="navbar-toggler-icon"></span>
          </button>

          <div
            class="collapse navbar-collapse align-items-center"
            id="navbarTogglerDemo02"
          >
            <ul class="nav navbar-nav ms-auto align-items-center">
              <li class="nav-item">
                <a class="nav-link menuItem" href="#">
                  <i class="fa fa-home fa-3" aria-hidden="true"></i> Home
                </a>
              </li>
              <li class="nav-item">
                <a class="nav-link menuItem" href="#">
                  <i class="fa fa-newspaper-o fa-3" aria-hidden="true"></i>
                  Timeline
                </a>
              </li>
              <li class="nav-item">
                <a class="nav-link menuItem" href="#">
                  <i class="fa fa-user fa-3" aria-hidden="true"></i>
                  Profile
                </a>
              </li>
              <li class="nav-item">
                <a class="nav-link menuItem" href="#">
                  <i class="fa fa-sign-out fa-3" aria-hidden="true"></i>
                  Logout
                </a>
              </li>
            </ul>
          </div>
        </div>
      </nav>
    </header>

    <div class="container">{% block content %} {% endblock %}</div>
  </body>

  <script
    src="https://code.jquery.com/jquery-3.3.1.slim.min.js"
    integrity="sha384-q8i/X+965DzO0rT7abK41JStQIAqVgRVzpbzo5smXKp4YfRvH+8abtTE1Pi6jizo"
    crossorigin="anonymous"
  ></script>
  <script
    src="https://cdnjs.cloudflare.com/ajax/libs/popper.js/1.14.7/umd/popper.min.js"
    integrity="sha384-UO2eT0CpHqdSJQ6hJty5KVphtPhzWj9WO1clHTMGa3JDZwrnQq4sF86dIHNDz0W1"
    crossorigin="anonymous"
  ></script>
  <script
    src="https://stackpath.bootstrapcdn.com/bootstrap/4.3.1/js/bootstrap.min.js"
    integrity="sha384-JjSmVgyd0p3pXB1rRibZUAYoIIy6OrQ6VrjIEaFf/nJGzIxFDsf4x0xIM+B07jRM"
    crossorigin="anonymous"
  ></script>
</html>
twitterclone/static/css/index.css
body { background-color: rgb(194, 218, 235); } .brand { font-weight: 1000; } .navigationHeader { font-weight: 500; } .navBrand { font-size: 1.5rem; } .menuItem { font-size: 1rem; color: rgb(198, 223, 226) !important; } .menuItem:hover { color: white !important; } -
Create another HTML file named
all-tweets.html. Add the following content below for now. This will be binded to the AllTweets view.twitterclone/tweets/templates/tweets/all-tweets.html
{% extends 'tweets/base.html' %}
{% load static %}

{% block title %}
Twitter Clone | Tweets
{% endblock %}

{% block content %}
<style>
  .tweetBtn {
    font-size: 80%;
    border-radius: 5rem;
    letter-spacing: 0.1rem;
    font-weight: bold;
    padding: 0.5rem;
    padding-left: 2rem;
    padding-right: 2rem;
    transition: all 0.2s;
    background-color: #2f98d4;
    color: white;
  }

  .tweetBtn:hover {
    background-color: #2473a0;
  }

  .iconBtn {
    color: rgb(81, 91, 102);
    font-size: large;
    font-weight: 1000;
  }

  .iconBtn:hover {
    color: #2f98d4;
  }
</style>
<div class="container allTweets">
  <div>
    <div class="card shadow mb-5 rounded border-0">
      <div class="card-header">
        <!-- Name Header -->
        <h2 class="card-title">Good day John Doe, post a tweet!</h2>
        <!-- End Name Header -->
      </div>
      <div class="card-body">
        <form>
          <div class="form-group">
            <!-- Tweet -->
            <textarea
              required
              name="tweet"
              class="form-control"
              id="createTweet"
              rows="3"
            >
            </textarea>
            <!-- End Tweet -->
          </div>
          <br />
          <div class="pull-right">
            <button type="submit" class="btn text-white tweetBtn">
              Tweet
            </button>
          </div>
        </form>
      </div>
    </div>
  </div>
  <br />
  <div>
    <h1>Checkout the latest Tweets!</h1>
    <div class="container">
      <!-- Cards -->
      <div class="card shadow mb-5 rounded border-0">
        <div
          class="card-header text-white border-0"
          style="background-color: #2f98d4;"
        >
          <div class="row row-cols-auto">
            <div class="col my-auto">
              <img
                class="tweet-profile-img my-auto"
                alt="john-doe"
                src="https://icon-library.com/images/generic-user-icon/generic-user-icon-19.jpg"
              />
            </div>
            <div class="col my-auto">
              <!-- Name -->
              <h4 class="my-auto">John Doe</h4>
              <!-- End Name -->
              <!-- Username -->
              <span>@johnDoe</span>
              <!-- End Username -->
            </div>
          </div>
        </div>
        <div class="card-body">
          <p class="card-text text-wrap">
            <!-- Date Created -->
            <span class="text-muted timestamp">
              Posted at 2017-09-01 18:39:43
            </span>
            <!-- End Date Created -->
            <br />
            <!-- Message -->
            Lorem ipsum dolor sit amet, consectetur adipiscing elit, sed do
            eiusmod tempor incididunt ut labore et dolore magna aliqua. Ut
            enim ad minim veniam, quis nostrud exercitation ullamco laboris
            nisi ut aliquip ex ea commodo consequat. Duis aute irure dolor in
            reprehenderit in voluptate velit esse cillum dolore eu fugiat
            nulla pariatur. Excepteur sint occaecat cupidatat non proident,
            sunt in culpa qui officia deserunt mollit anim id est laborum.
            <!-- End Message -->
          </p>
          <br />
          <!-- User only -->
          <div class="pull-right row row-cols-auto">
            <div class="col">
              <!-- Edit -->
              <a href="#" style="background: none; border: none;">
                <i
                  class="iconBtn fa fa-pencil-square-o fa-3"
                  aria-hidden="true"
                ></i>
              </a>
              <!-- End Edit -->
            </div>
            <div class="col">
              <!-- Delete -->
              <form>
                <button
                  type="submit"
                  style="background: none; border: none;"
                >
                  <i
                    class="iconBtn fa fa-trash-o fa-3"
                    aria-hidden="true"
                  ></i>
                </button>
              </form>
              <!-- End Delete -->
            </div>
          </div>
          <!-- End User only -->
        </div>
      </div>
      <!-- End Cards -->
    </div>
  </div>
</div>
{% endblock %}
twitterclone/static/css/index.css
.allTweets { margin-top: 1rem; margin-bottom: 1rem; } .tweet-profile-img { width: 2.5rem; height: 2.5rem; object-fit: cover; border-radius: 50%; align-self: center; } .card-body p { margin: 1rem; } textarea { height: 8rem; min-height: 8rem; max-height: 8rem; resize: none; } .timestamp { font-size: small; } -
Bind the
all-tweets.htmltemplate to the AllTweets view by updating thegetfunction. This will be a static page for now. Simply follow the code below:twitterclone/tweets/views.py
from django.shortcuts import render from django.views import View from django.http import HttpResponse # Create your views here. class AllTweets(View): def get(self, request, *args, **kwargs): return render(request, template_name='tweets/all-tweets.html', context={}) # This is the updated line. def post(self, request, *args, **kwargs): pass -
To save the “tweets”, a dedicated tweets table must be created in the database. This table needs a foreign key coming from the profile table to identify which profile created each tweet. Create the Tweet model by following the code below:
twitterclone/tweets/models.pyfrom django.db import models from accounts.models import Profile # Create your models here. class Tweet(models.Model): user = models.ForeignKey(Profile, null=True, on_delete=models.SET_NULL) msg = models.TextField() date_created = models.DateTimeField(auto_now_add=True, null=True) def __str__(self): return self.msg - To fully create the model, run the command below to make the migration.
(twtclone)$ python manage.py makemigrations -
Afterwards, run the migrate command again to fully construct the changes to the database.
(twtclone)$ python manage.py migrate -
Open the
admin.pyfile of the tweets app and add the following lines of code:from .models import * # imports all models in tweets app admin.site.register(Tweet) -
You may now check if the new table was added successfully by visiting the Admin Panel at http://127.0.0.1:8000/admin.
(twtclone)$ python manage.py runserver -
Inside the admin panel, for now, add some entries on profiles and tweets. This will be our test entries for displaying database entries in our AllTweets view.
-
Modify the
getmethod for the AllTweets view and add the following lines to issue a query on the database acquring all entries in the tweets table sorted by latest to oldest.... import .models import * # import the models in the views.py to be able to interact with its schema and entries ... def get(self, request, *args, **kwargs): tweets = Tweet.objects.all().order_by('-date_created') return render(request, template_name='tweets/all-tweets.html', context={'tweets':tweets}) -
To make our template dynamic, we will have to modify its content. This can be done using Jinja templates to render the output of our Python code inside the HTML file. Using a for loop, all entries from the tweets object will be displayed. You may update the contents of your
all-tweets.htmlto the one below.{% extends 'tweets/base.html' %} {% load static %} {% block title %} Twitter Clone | Tweets {% endblock %} {% block content %} <style> .tweetBtn { font-size: 80%; border-radius: 5rem; letter-spacing: 0.1rem; font-weight: bold; padding: 0.5rem; padding-left: 2rem; padding-right: 2rem; transition: all 0.2s; background-color: #2f98d4; color: white; } .tweetBtn:hover { background-color: #2473a0; } .iconBtn { color: rgb(81, 91, 102); font-size: large; font-weight: 1000; } .iconBtn:hover { color: #2f98d4; } </style> <div class="container allTweets"> <div> <div class="card shadow mb-5 rounded border-0"> <div class="card-header"> <!-- Name Header --> <h2 class="card-title">Good day John Doe, post a tweet!</h2> <!-- End Name Header --> </div> <div class="card-body"> <form> <div class="form-group"> <!-- Tweet --> <textarea required name="tweet" placeholder="What's on your mind?" class="form-control" id="createTweet" rows="3" ></textarea> <!-- End Tweet --> </div> <br /> <div class="pull-right"> <button type="submit" class="btn text-white tweetBtn"> Tweet </button> </div> </form> </div> </div> </div> <br /> <div> <h1>Checkout the latest Tweets!</h1> <div class="container"> <!-- Cards --> {% for tweet in tweets %} <div class="card shadow mb-5 rounded border-0"> <div class="card-header text-white border-0" style="background-color: #2f98d4;" > <div class="row row-cols-auto"> <div class="col my-auto"> <img class="tweet-profile-img my-auto" alt="john-doe" src="https://icon-library.com/images/generic-user-icon/generic-user-icon-19.jpg" /> </div> <div class="col my-auto"> <!-- Name --> <h4 class="my-auto"> {{ tweet.user.first_name }} {{ tweet.user.last_name }} </h4> <!-- End Name --> <!-- Username --> <span>@{{ tweet.user.username }}</span> <!-- End Username --> </div> </div> </div> <div class="card-body"> <p class="card-text text-wrap"> <!-- Date Created --> <span class="text-muted timestamp"> {{ tweet.date_created }} </span> <!-- End Date Created --> <br /> <!-- Message --> {{ tweet.msg }} <!-- End Message --> </p> <br /> <!-- User only --> <div class="pull-right row row-cols-auto"> <div class="col"> <!-- Edit --> <a href="#" style="background: none; border: none;"> <i class="iconBtn fa fa-pencil-square-o fa-3" aria-hidden="true" ></i> </a> <!-- End Edit --> </div> <div class="col"> <!-- Delete --> <form> <button type="submit" style="background: none; border: none;" > <i class="iconBtn fa fa-trash-o fa-3" aria-hidden="true" ></i> </button> </form> <!-- End Delete --> </div> </div> <!-- End User only --> </div> </div> {% endfor %} <!-- End Cards --> </div> </div> </div> {% endblock %} -
You may view the updated page at http://127.0.0.1:8000/all-tweets. We will leave this for now as we will create the other functionalities to make the page fully useable.
(twtclone)$ python manage.py runserver
Creating an account registration page
In Django, we have the option to manually handle theregistration of accounts in our database or integrate them via forms. In this section, we will be using the combination of both to register a user with an account in the built in Django user data base and integrate it with manual entries to a dedicated profile table.
-
In the accounts app, create a preliminary view for the registration page with a post and get method and bind it to a specific URL pattern. Add an HTML template as well. You may simply follow the code for each file below.
twitterclone/accounts/views.py
class Register(View):
  def get(self, request, *args, **kwargs):
    return render(request, template_name='accounts/register.html')

  def post(self, request, *args, **kwargs):
    pass
twitterclone/accounts/urls.py
urlpatterns = [
 path('', views.Login.as_view(), name='login'),
 path('register/', views.Register.as_view(), name='register'),
]
twitterclone/accounts/templates/accounts/register.html
{% extends 'accounts/base.html' %} {% load static %} {% block title %} Twitter Clone | Register {% endblock %} {% block content %} <div> <h1>Register</h1> </div> {% endblock %} -
Proceed on creating a
forms.pyfile inside the accounts app directory (twitterclone/accounts/). This will create a form that we can use as inputs for our frontend. You may simply copy the code below.from django.forms import ModelForm from django.contrib.auth.forms import UserCreationForm from django.contrib.auth.models import User class CreateUserForm(UserCreationForm): class Meta: model = User fields = ['first_name', 'last_name', 'username', 'email', 'password1', 'password2'] def __init__(self, *args, **kwargs): super(CreateUserForm, self).__init__(*args, **kwargs) self.fields['first_name'].widget.attrs.update( {'class': 'form-control', 'placeholder': 'First Name'}) self.fields['last_name'].widget.attrs.update( {'class': 'form-control', 'placeholder': 'Last Name'}) self.fields['username'].widget.attrs.update( {'class': 'form-control', 'placeholder': 'Username'}) self.fields['email'].widget.attrs.update( {'class': 'form-control', 'placeholder': 'Email'}) self.fields['password1'].widget.attrs.update( {'class': 'form-control', 'placeholder': 'Password'}) self.fields['password2'].widget.attrs.update( {'class': 'form-control', 'placeholder': 'Confirm Password'})Your updated local directory structure should look similar to this.
twitterclone/ |__ accounts/ | |__ __pycache__/ | |__ migrations/ | |__ accounts/ | | |__ templates/ | | |__ base.html | | |__ login.html | | |__ register.html | |__ __init__.py | |__ admin.py | |__ apps.py | |__ forms.py | |__ models.py | |__ tests.py | |__ urls.py | |__ views.py |__ static/ | |__ css/ | | |__ index.css | |__ img/ | |__ js/ |__ tweets/ | |__ __pycache__/ | |__ migrations/ | |__ tweets/ | | |__ templates/ | | |__ all-tweets.html | | |__ base.html | |__ __init__.py | |__ admin.py | |__ apps.py | |__ models.py | |__ tests.py | |__ urls.py | |__ views.py |__ twitterclone/ | |__ __pycache__/ | |__ __init__.py | |__ .env | |__ asgi.py | |__ settings.py | |__ urls.py | |__ wsgi.py |__ .gitignore |__ db.sqlite3 |__ manage.py -
Update the Profile model as well to create a one is to one connection with the profile and user. You may follow the updated code below:
twitterclone/accounts/models.py
from django.db import models from django.contrib.auth.models import User # Create your models here. class Profile(models.Model): user = models.OneToOneField(User, null=True, on_delete=models.CASCADE) first_name = models.CharField(max_length=200, null=True) last_name = models.CharField(max_length=200, null=True) username = models.CharField(max_length=200, null=True) email = models.CharField(max_length=200, null=True) date_created = models.DateTimeField(auto_now_add=True, null=True) def __str__(self): return self.email -
Proceed on running the migrations to update the database information.
(twtclone)$ python manage.py makemigrations (twtclone)$ python manage.py migrate -
Import
forms.pyinsideviews.pyand update the get and post method of the Register view to reference the created form.from django.shortcuts import render, redirect # Add redirect to the imports ... from .forms import CreateUserForm from .models import * from django.contrib import messages ... class Register(View): def get(self, request, *args, **kwargs): form = CreateUserForm() return render(request, template_name='accounts/register.html', context={'form': form}) def post(self, request, *args, **kwargs): form = CreateUserForm(request.POST) if form.is_valid(): user = form.save() first_name = form.cleaned_data['first_name'] last_name = form.cleaned_data['last_name'] username = form.cleaned_data['username'] email = form.cleaned_data['email'] profile = Profile(user=user, first_name=first_name, last_name=last_name, email=email, username=username) profile.save() return redirect('/registration-success/') # Notice that this path, nor its template is still not created. This will be craeted later on. else: messages.error(request, 'There was an error.') return render(request, template_name='accounts/register.html', context={'form': form}) -
This time as well, update the
register.htmlfile to integrate the form in the frontend. You may copy the updated content of the file below. Update theindex.cssfile as well to fully incorporate the updated design.twitterclone/accounts/templates/register.html
{% extends 'accounts/base.html' %}
{% load static %}

{% block title %}
Twitter Clone | Register
{% endblock %}

{% block content %}
<div>
  <div class="container">
    <div class="row">
      <div class="col-sm-9 col-md-7 col-lg-5 mx-auto">
        <div class="card card-signin my-5">
          <div class="card-body">
            <h3 class="text-center">Sign up an account</h3>
            <br />
            <!-- This form is assigned with a method of post request since it is meant to send a data/payload to the backend  -->
            <form class="form-signin" method="POST">
              {% csrf_token %}
              <!-- Declaring a CSRF Token is required for post requests in Django forms -->

              <div class="form-label-group">
                <div class="row">
                  <div class="col form-label-group">
                    {{ form.first_name }}
                    <label for="id_first_name">First Name</label>
                  </div>
                  <div class="col form-label-group">
                    {{ form.last_name }}
                    <label for="id_last_name">Last Name</label>
                  </div>
                </div>

                <div class="row">
                  <div class="form-label-group">
                    {{ form.email }}
                    <label for="id_email">Email</label>
                  </div>
                </div>

                <div class="row">
                  <div class="form-label-group">
                    {{ form.username }}
                    <label for="id_username">Username</label>
                  </div>
                </div>

                <div class="row">
                  <div class="form-label-group">
                    {{ form.password1 }}
                    <label for="id_password1">Password</label>
                  </div>
                </div>

                <div class="row">
                  <div class="form-label-group">
                    {{ form.password2 }}
                    <label for="id_password2">Confirm Password</label>
                  </div>
                </div>

                <script>
                  var password = document.getElementById("id_password1"),
                    confirm_password =
                      document.getElementById("id_password2");

                  function validatePassword() {
                    if (password.value != confirm_password.value) {
                      confirm_password.setCustomValidity(
                        "Passwords Don't Match"
                      );
                    } else {
                      confirm_password.setCustomValidity("");
                    }
                  }

                  password.onchange = validatePassword;
                  confirm_password.onkeyup = validatePassword;
                </script>
              </div>

              <button
                name="Create User"
                class="btn text-uppercase"
                type="submit"
                style="width: 100%;"
              >
                Sign Up
              </button>
              <hr class="my-4" />
              <p class="text-center">
                Already have an account?
                <a href="{% url 'login' %}" style="text-decoration: none;"
                  >Login</a
                >
              </p>
              {% for message in messages %}
                {% if form.errors %}
                  {% for field in form %}
                    {% for error in field.errors %}
                    <div class="alert alert-danger">
                      <strong>{{ error|escape }}</strong>
                    </div>
                    {% endfor %}
                  {% endfor %}
                  {% for error in form.non_field_errors %}
                    <div class="alert alert-danger">
                      <strong>{{ error|escape }}</strong>
                    </div>
                  {% endfor %}
                {% endif %}
              {% endfor %}
            </form>
          </div>
        </div>
      </div>
    </div>
  </div>
</div>
{% endblock %}
twitterclone/static/css/index.css
:root { --input-padding-x: 1.5rem; --input-padding-y: 0.75rem; } .card-signin { border: 0; border-radius: 0rem; box-shadow: 0 0.5rem 1rem 0 rgba(0, 0, 0, 0.1); } .card-signin .card-title { margin-bottom: 2rem; font-weight: 300; font-size: 1.5rem; } .card-signin .card-body { padding: 2rem; } .form-signin { width: 100%; } .form-signin .btn { font-size: 80%; border-radius: 5rem; letter-spacing: 0.1rem; font-weight: bold; padding: 1rem; transition: all 0.2s; background-color: #2f98d4; color: white; } .form-signin .btn:hover { background-color: #2473a0; } .form-label-group { position: relative; margin-bottom: 1rem; } .form-label-group input { height: auto; border-radius: 0.5rem; } .form-label-group > input, .form-label-group > label { padding: var(--input-padding-y) var(--input-padding-x); } .form-label-group > label { position: absolute; top: 0; left: 0; display: block; width: 100%; margin-bottom: 0; /* Override default `<label>` margin */ line-height: 1.5; color: #495057; border: 1px solid transparent; border-radius: 0.25rem; transition: all 0.1s ease-in-out; } .form-label-group input::-webkit-input-placeholder { color: transparent; } .form-label-group input:-ms-input-placeholder { color: transparent; } .form-label-group input::-ms-input-placeholder { color: transparent; } .form-label-group input::-moz-placeholder { color: transparent; } .form-label-group input::placeholder { color: transparent; } .form-label-group input:not(:placeholder-shown) { padding-top: calc( var(--input-padding-y) + var(--input-padding-y) * (2 / 3) ); padding-bottom: calc(var(--input-padding-y) / 3); } .form-label-group input:not(:placeholder-shown) ~ label { padding-top: calc(var(--input-padding-y) / 3); padding-bottom: calc(var(--input-padding-y) / 3); font-size: 12px; color: #777; } /* Fallback for Edge -------------------------------------------------- */ @supports (-ms-ime-align: auto) { .form-label-group > label { display: none; } .form-label-group input::-ms-input-placeholder { color: #777; } } /* Fallback for IE -------------------------------------------------- */ @media all and (-ms-high-contrast: none), (-ms-high-contrast: active) { .form-label-group > label { display: none; } .form-label-group input:-ms-input-placeholder { color: #777; } } -
This time, we will create a dedicated page to confirm successful registration. Proceed on adding a view, URL path, and creating template for this page named
registration-success.htmlby following the code below.twitterclone/accounts/views.py
class RegistrationSuccess(View):
  def get(self, request, *args, **kwargs):
      return render(request, template_name='accounts/registration-success.html', context={})
twitterclone/accounts/urls.py
urlpatterns = [
    path('', views.Login.as_view(), name='login'),
    path('register/', views.Register.as_view(), name='register'),
    path('registration-success/', views.RegistrationSuccess.as_view(), name='registration-success'),
]
twitterclone/accounts/templates/accounts/registration-success.html
{% extends 'accounts/base.html' %}
{% load static %}

{% block title %}
Twitter Clone | Registration Successful
{% endblock %}

{% block content %}
<div>
  <div class="container">
    <div class="row">
      <div class="col-sm-9 col-md-7 col-lg-5 mx-auto">
        <div class="card card-signin my-5">
          <div class="card-body">
            <h3 class="text-center">Registration Successful!</h3>
            <br />

            <p class="text-center">
              You have successfully registered an account. You may now
              proceed on logging in.
            </p>

            <a
              name="Create User"
              class="btn text-uppercase text-white bg-info"
              href="{% url 'login' %}"
              style="width: 100%;"
              ><b>LOGIN</b></a
            >
          </div>
        </div>
      </div>
    </div>
  </div>
</div>
{% endblock %}
Your updated local directory should look similar to this:
twitterclone/ |__ accounts/ | |__ __pycache__/ | |__ migrations/ | |__ accounts/ | | |__ templates/ | | |__ base.html | | |__ login.html | | |__ register.html | | |__ registration-success.html | |__ __init__.py | |__ admin.py | |__ apps.py | |__ forms.py | |__ models.py | |__ tests.py | |__ urls.py | |__ views.py |__ static/ | |__ css/ | |__ index.css | |__ img/ | |__ js/ |__ tweets/ | |__ __pycache__/ | |__ migrations/ | |__ tweets/ | | |__ templates/ | | |__ all-tweets.html | | |__ base.html | |__ __init__.py | |__ admin.py | |__ apps.py | |__ models.py | |__ tests.py | |__ urls.py | |__ views.py |__ twitterclone/ | |__ __pycache__/ | |__ __init__.py | |__ .env | |__ asgi.py | |__ settings.py | |__ urls.py | |__ wsgi.py |__ .gitignore |__ db.sqlite3 |__ manage.py -
You may now check if the registration is working properly by monitoring the entries in the profile and users table from the Admin Panel.
(twtclone)$ python manage.py runserver
Creating a functional login page with proper redirection and decorators
Now that the user registration page has been created, it is time to discuss how these users will be able to access the pages of the application through logging in. In this section, we will implement the use of decorators as well to restrict access to certain pages, inline with the the use of Jinja templates to dynamically make changes to the page based on user authentication.
-
Proceed on modifying the post method of the Login view from the accounts app. Firstly, import the Django authentication library and import the built in
loginfunction. We will create the view in such a way that if the user that login is a superuser, he/she will be redirected to the page of the admin panel (/admin). Otherwise, regular users will be redirected to the all tweets page (tweets/all-tweets). You may follow the updated code below.twitterclone/accounts/views.py
from django.contrib.auth import authenticate, login ... class Login(View): def get(self, request, *args, **kwargs): return render(request, template_name='accounts/login.html', context={}) def post(self, request, *args, **kwargs): username = request.POST.get('username') password = request.POST.get('password') user = authenticate(request, username=username, password=password) if user is not None: login(request, user) if user.is_superuser: return redirect('/admin') else: return redirect('/tweets/all-tweets') else: messages.info(request, 'Username or Password is incorrect.') return render(request, template_name='accounts/login.html', context={}) -
We will now proceed on binding the functionalities set in this view to the login template. To do so, you may follow the updated code below. This login page shares the same CSS code with the register page along with a couple of intext and inline styling. Hence all you need is to update the
login.htmlfile and thebase/htmlfile from the accounts app templates .twitterclone/accounts/templates/accounts/login.html
{% extends 'accounts/base.html' %}
{% load static %}

{% block title %}
Twitter Clone | Login
{% endblock %}

{% block content %}
<style>
  .nounderline {
    color: rgb(105, 199, 236);
    text-decoration: none;
  }

  .nounderline:hover {
    color: rgb(117, 235, 235);
    text-decoration: underline;
  }

  .signin {
    display: block;
  }

  @media (max-width: 480px) {
    .signin {
      margin: 0;
      display: flex;
      justify-content: center;
      width: 100%;
    }
  }
</style>

<div class="container-fluid mb-5">
  <div class="row p-3 mt-5 justify-content-md-center">
    <h2 class="text-white">
      Welcome to Twitter<span class="brand">CLONE</span>!
    </h2>
  </div>
  <div class="row container-fluid mb-0 justify-content-md-center">
    <div class="col col-lg-7 container-fluid">
      <div class="my-5 p-4">
        <p class="text-white">
          This is Twitter<span class="brand">CLONE</span>, a simple Twitter
          clone made using <i>Django</i> framework in <i>Python</i>.
        </p>
        <p class="text-white">
          This web application is part of a tutorial made by
          <a class="nounderline" href="http://paucabral.github.io"
            >Pau Cabral</a
          >
          on the development of a <i>Django</i> web application, to its
          deployment to <i>Heroku</i>.
        </p>
        <br />
        <br />
        <p class="text-white">
          You may visit this project's repository at
          <a
            style="font-weight: bold;"
            class="nounderline"
            href="https://github.com/paucabral/twitter-clone/"
            >Github</a
          >.
        </p>
      </div>
    </div>

    <div class="col container-fluid ms-auto signin">
      <div class="row justify-content-md-center">
        <div class="col my-auto">
          <div class="card card-signin">
            <div class="card-body">
              <h3 class="text-center">Sign In</h3>
              <br />
              <form class="form-signin" method="POST">
                {% csrf_token %}
                <div class="form-label-group">
                  <input
                    type="text"
                    id="username"
                    class="form-control"
                    name="username"
                    placeholder="Username"
                    required
                    autofocus
                  />
                  <label for="username">Username</label>
                </div>

                <div class="form-label-group">
                  <input
                    type="password"
                    minlength="8"
                    id="password"
                    class="form-control"
                    name="password"
                    placeholder="Password"
                    required
                  />
                  <label for="password">Password</label>
                </div>
                <br />
                <button
                  class="btn text-uppercase"
                  type="submit"
                  style="width: 100%;"
                >
                  Sign in
                </button>
                <hr class="my-4" />

                {% for message in messages %}
                <div class="alert alert-danger">
                  <b class="text-center">{{ message }}</b>
                </div>
                {% endfor %}

                <p class="text-center">
                  Don't have an account yet?
                  <a
                    href="{% url 'register' %}"
                    style="text-decoration: none;"
                    >Sign Up</a
                  >
                </p>
              </form>
            </div>
          </div>
        </div>
      </div>
    </div>
  </div>
</div>
{% endblock %}
twitterclone/accounts/templates/accounts/base.html
{% load static %} <!DOCTYPE html> <html lang="en"> <head> <meta charset="utf-8" /> <meta http-equiv="X-UA-Compatible" content="IE=edge" /> <meta name="viewport" content="width=device-width, initial-scale=1" /> <title>{% block title %}{% endblock %}</title> <link href="https://cdn.jsdelivr.net/npm/bootstrap@5.0.2/dist/css/bootstrap.min.css" rel="stylesheet" integrity="sha384-EVSTQN3/azprG1Anm3QDgpJLIm9Nao0Yz1ztcQTwFspd3yD65VohhpuuCOmLASjC" crossorigin="anonymous" /> <link rel="stylesheet" type="text/css" href="{% static 'css/index.css' %}" /> <style> .bg { background-image: linear-gradient( rgba(0, 0, 0, 0.5), rgba(0, 0, 0, 0.5) ), url("https://media.gettyimages.com/photos/blurred-crowd-of-unrecognizable-at-the-street-picture-id1179844008?b=1&k=6&m=1179844008&s=170667a&w=0&h=TgItFSgBEqiSJcjF34G_0ho8936PL_HR0pfC-CuI_jQ="); background-repeat: no-repeat; background-attachment: fixed; background-size: cover; } </style> </head> <body class="bg"> <div class="container">{% block content %} {% endblock %}</div> </body> </html> -
To fully enhance the user experience on the landing page after login (
/tweets/all-tweets), edit the boilerplate code,all-tweets.htmlin the section that is meant to display name of the user (commented as<!-- Name Header -->). This will be done through Django’s built-in user identification with login authentication. To do so, simply follow the code below.... <!-- Name Header --> <h2 class="card-title"> Good day {% if user.profile.first_name|length > 0 %} {{ user.profile.first_name }} {{ user.profile.last_name }}, {% else %} {{ user.username }}, {% endif %}post a tweet! </h2> <!-- End Name Header --> ... -
We can now proceed on creating a simple view for logging out users. This will be done by ending their session through Django’s built-in
logoutfunction from its authentication library. Proceed on adding the view in the accounts app, creating a corresponding URL path for it, and binding the dedicated logout button from the navigation bar, found in thebase.htmltemplate in the tweets app.twitterclone/accounts/views.py
 ...

 from django.contrib.auth import authenticate, login, logout # Add logout to the updated imports

 ...

 # Note: This function is not part of any class. This is a sole function view.
 def logoutUser(request):
   logout(request)
   return redirect('/')
twitterclone/accounts/urls.py
from django.urls import path
from . import views

urlpatterns = [
  path('', views.Login.as_view(), name='login'),
  path('register/', views.Register.as_view(), name='register'),
  path('registration-success/', views.RegistrationSuccess.as_view(), name='registration-success'),
  path('logout/', views.logoutUser, name='logout'), # Since the view is not a class, it is not invoked with the .as_view() method.
]
twitterclone/tweets/templates/tweets/base.html
... <li class="nav-item"> <a class="nav-link menuItem" href="/logout"> <!-- The href is set to the absolute path for logout view --> <i class="fa fa-sign-out fa-3" aria-hidden="true"></i> Logout </a> </li> ... -
While the application can now identify which user is logged in, all pages are still exposed simply by typing the exact URL. For instance, you should notice that you are still able to access
/tweets/all-tweetsdespite being logged out just by going directly to http://127.0.0.1:8000/tweets/all-tweets. We can use Django’s built-in decorator to impose login as a requirement in order to view or send requests to certain pages. Moreover, we can also implement our own by creating a custom decorator if needed. This will be applied on each view where login is required. Proceed on importing thelogin_requireddecorator and add it to the methods of the AllTweets view in the tweets app, and the logoutUser view in the accounts app, with the login path (/) as the parameter for redirection in case the user is not logged in. You may follow the code below.twitterclone/tweets/views.py
 ...

 from django.contrib.auth.decorators import login_required
 from django.utils.decorators import method_decorator

 ...

 class AllTweets(View):
 @method_decorator(login_required(login_url='/'))
 def get(self, request, *args, **kwargs):
     tweets = Tweet.objects.all().order_by('-date_created')
     return render(request, template_name='tweets/all-tweets.html', context={'tweets': tweets})

 @method_decorator(login_required(login_url='/'))
 def post(self, request, *args, **kwargs):
     pass
twitterclone/accounts/views.py
...

from django.contrib.auth.decorators import login_required

...

@login_required(login_url='/') # Add it just above the view.
def logoutUser(request):
    logout(request)
   return redirect('/')
Note: Class based views require an additional import of method decorator. Refer to the implementation in the AllTweets view.
-
One remaining problem with our project is even if a user has been authenticated already, the user is still able to access the login page. This may confuse them to login again even if their session is still active as they have not actually logged out yet. To fix this we will create a custom decorator for our Login and Register views. Start by creating a file named
decorators.pyin the accounts app directory (twitterclone/accounts/) and add the following code inside:twitterclone/accounts/decorators.py
 from django.shortcuts import redirect


 def unauthenticated_user(view_func):
   def wrapper_func(request, *args, **kwargs):

     if request.user.is_authenticated:
         return redirect('/tweets/all-tweets')
     else:
         return view_func(request, *args, **kwargs)

 return wrapper_func
Your updated local directory should look similar to this:
twitterclone/ |__ accounts/ | |__ __pycache__/ | |__ migrations/ | |__ accounts/ | | |__ templates/ | | |__ base.html | | |__ login.html | | |__ register.html | | |__ registration-success.html | |__ __init__.py | |__ admin.py | |__ apps.py | |__ decorators.py | |__ forms.py | |__ models.py | |__ tests.py | |__ urls.py | |__ views.py |__ static/ | |__ css/ | |__ index.css | |__ img/ | |__ js/ |__ tweets/ | |__ __pycache__/ | |__ migrations/ | |__ tweets/ | | |__ templates/ | | |__ all-tweets.html | | |__ base.html | |__ __init__.py | |__ admin.py | |__ apps.py | |__ models.py | |__ tests.py | |__ urls.py | |__ views.py |__ twitterclone/ | |__ __pycache__/ | |__ __init__.py | |__ .env | |__ asgi.py | |__ settings.py | |__ urls.py | |__ wsgi.py |__ .gitignore |__ db.sqlite3 |__ manage.py -
After creating the custom decorator, apply it to the methods of Login and Register view. Follow the code below for implementation.
tweetclone/accounts/views.py
... from .decorators import * # import the contents of decorators.py from django.utils.decorators import method_decorator # import method_decorator to apply decorator in methods inside a class ... class Login(View): # Apply the custom decorator here. @method_decorator(unauthenticated_user) def get(self, request, *args, **kwargs): return render(request, template_name='accounts/login.html', context={}) # Apply the custom decorator here. @method_decorator(unauthenticated_user) def post(self, request, *args, **kwargs): username = request.POST.get('username') password = request.POST.get('password') user = authenticate(request, username=username, password=password) if user is not None: login(request, user) if user.is_superuser: return redirect('/admin') else: return redirect('/tweets/all-tweets') else: messages.info(request, 'Username or Password is incorrect.') return render(request, template_name='accounts/login.html', context={}) @login_required(login_url='/') def logoutUser(request): logout(request) return redirect('/') class Register(View): # Apply the custom decorator here. @method_decorator(unauthenticated_user) def get(self, request, *args, **kwargs): form = CreateUserForm() return render(request, template_name='accounts/register.html', context={'form': form}) # Apply the custom decorator here. @method_decorator(unauthenticated_user) def post(self, request, *args, **kwargs): form = CreateUserForm(request.POST) if form.is_valid(): user = form.save() first_name = form.cleaned_data['first_name'] last_name = form.cleaned_data['last_name'] username = form.cleaned_data['username'] email = form.cleaned_data['email'] profile = Profile(user=user, first_name=first_name, last_name=last_name, email=email, username=username) profile.save() return redirect('/registration-success/') else: messages.error(request, 'There was an error.') return render(request, template_name='accounts/register.html', context={'form': form}) class RegistrationSuccess(View): # Apply the custom decorator here. @method_decorator(unauthenticated_user) def get(self, request, *args, **kwargs): return render(request, template_name='accounts/registration-success.html', context={}) -
The functionalities should now be properly applied. Going directly to http://127.0.0.1:8000/tweets/all-tweets should result to automatic redirection to the login page if the user is not authenticated.
(twtclone)$ python manage.py runserver
Fully functional AllTweets view
In this section, we will go back to building the functionalities of the AllTweets view. We are now going to implement proper form submission to “post a tweet” and add the other functionalities as well such as the option to edit or delete a user-owned ‘tweet’. This will now be a fully functional (create, read, update, delete) CRUD page.
-
Start by updating the AllTweets view. This time around, we will be grabbing the information from the post request without the aid of using Django’s built-on forms. We are going to get the current user profile associated to the tweet by extracting it with the request from the currently logged in user. Moreover, the field for the tweet will be added by capturing the field specified by its
nameattribute after submit (notice the<textarea>has an attributenamewith a value oftweetinall-tweets.html). You may simply copy the code below. You may run the project and check the functionality afterwards.twitterclone/tweets/views.py
 from django.shortcuts import render, redirect # Add redirect among the list of imports

 ...

 class AllTweets(View):
 @method_decorator(login_required(login_url='/'))
 def get(self, request, *args, **kwargs):
     tweets = Tweet.objects.all().order_by('-date_created')
     return render(request, template_name='tweets/all-tweets.html', context={'tweets': tweets})

 @method_decorator(login_required(login_url='/'))
 def post(self, request, *args, **kwargs): # Update the post method with the following lines of code
     user = request.user.profile # Checks the user from the request and associate the profile as defined in the model
     msg = request.POST.get('tweet') # Gets the form from the request and extracts the data from an input with an attribute "name" which value is "tweet"
     tweet = Tweet(user=user, msg=msg) # Set the parameters for new entry in the Tweet model
     tweet.save() # Save the tweet
     return redirect('/tweets/all-tweets')
twitterclone/tweets/templates/tweets/all-tweets.py
<!-- Add method attribute as "POST" --> <form method="POST"> <!-- Make sure to define CSRF Token --> {% csrf_token %} <div class="form-group"> <!-- Tweet --> <textarea required name="tweet" placeholder="What's on your mind?" class="form-control" id="createTweet" rows="3" ></textarea> <!-- End Tweet --> </div> <br /> <div class="pull-right"> <button type="submit" class="btn text-white tweetBtn">Tweet</button> </div> </form> -
Next is setting up when the edit and delete button should appear in the page. The user must only be able to edit and delete the tweet he/she created. As such, we have to modify the part of the code in
all-tweets.htmltemplate (check the part with a comment indicatingUser only) with a condition that checks if the assigned user profile to the tweet is the same user that is currently logged in. Do this by simply adding the conditions via Jinja templates. You may simply follow the code below.<!-- User only --> {% if tweet.user.id == user.profile.id %} <div class="pull-right row row-cols-auto"> <div class="col"> <!-- Edit --> <a href="#" style="background: none; border: none;"> <i class="iconBtn fa fa-pencil-square-o fa-3" aria-hidden="true"></i> </a> <!-- End Edit --> </div> <div class="col"> <!-- Delete --> <form> <button type="submit" style="background: none; border: none;"> <i class="iconBtn fa fa-trash-o fa-3" aria-hidden="true"></i> </button> </form> <!-- End Delete --> </div> </div> {% else %} <br /> {% endif %} <!-- End User only --> -
To delete a ‘tweet’, each delete button must be assigned with a unique value that is equal to the ID of the ‘tweet’. This way, a query to delete that entry would be possible. A new view with a dynamic URL path have to be created as well that will handle the specified endpoint with the form of the delete button to avoid conflict with the the previous form. You may follow the updated code for the files below.
twitterclone/tweets/views.py
@login_required(login_url='/')
def deleteTweet(request, id): # The view expects to receive parameter of 'id' with the request
    if request.method == "POST":
        tweet = id # The paramater from the request is stored
        tweet_instance = Tweet.objects.filter(id=tweet) # The parameter was used to locate the entry from the database
        tweet_instance.delete() # The entry was deleted
    return redirect('/tweets/all-tweets')
Note: This view is not part of any class. This is a simple view defined using a function.
twitterclone/tweets/views.py
 urlpatterns = [
     path('all-tweets', views.AllTweets.as_view(), name='all-tweets'),
     path('delete-tweet/<id>', views.deleteTweet, name='delete-tweet'), # Added this new URL path. Enclose in tags is 'id' which is a dynamic element. This is to specify to the delete endpoint a specific id as parameter.
 ]
twitterclone/tweets/templates/all-tweets.html
<!-- Delete --> <!-- Specified method as POST with a defined endpoint with action attribute. This leads to the delete-tweet URL (/tweets/delete-tweet/<id>) with a specified parameter of tweet.id --> <form method="POST" action="{% url 'delete-tweet' tweet.id %}"> <!-- Like the previous forms, do not forget to include the CSRF Token declaration--> {% csrf_token %} <button name="deletetweet" value="{{ tweet.id }}" type="submit" style="background: none; border: none;" > <i class="iconBtn fa fa-trash-o fa-3" aria-hidden="true"></i> </button> </form> <!-- End Delete --> -
While the delete functionality is working properly now, it is not ideal to allow users do such operation without any warning. We can use the
onsubmitattribute of forms to display a simple alert message using an inline Javascript. To do this, simply update the opening tag of the form for delete button, the same as the code below.twitterclone/tweets/templates/all-tweets.html
<!-- Notice the onsubmit attribute invokes an alert dialouge to confirm if the action is to be continued. --> <form onsubmit="return confirm('Are you sure you want to delete the tweet: {{ tweet.msg }} ?');" method="POST" action="{% url 'delete-tweet' tweet.id %}" > {% csrf_token %} <button name="deletetweet" value="{{ tweet.id }}" type="submit" style="background: none; border: none;" > <i class="iconBtn fa fa-trash-o fa-3" aria-hidden="true"></i> </button> </form> -
Next is the creation of a page to update user owned tweets. Start by creating a new view with a dynamic URL pattern. This is because, each tweet will have its own instance as an entry, hence it will be accessed on a unique URL. You may follow the code below:
twitterclone/tweets/views.py
 class EditTweet(View):
 @method_decorator(login_required(login_url='/'))
 def get(self, request, *args, **kwargs):
     tweet_id = self.kwargs['id'] # Get the ID from the 'id' parameter in the URL
     tweet = Tweet.objects.get(id=tweet_id) # Get the instance of from the database using the parameter
     tweet_id = tweet.user.id # Extract the ID of the user assigned to the tweet
     tweet_msg = tweet.msg # Extract the message (msg) from the entry
     return render(request, template_name='tweets/update-tweet.html', context={'tweet_id': tweet_id, 'tweet_msg': tweet_msg}) # Pass the variables to the template through context

 @method_decorator(login_required(login_url='/'))
 def post(self, request, *args, **kwargs):
     tweet_id = self.kwargs['id'] # Get the ID from the 'id' parameter in the URL
     tweet = Tweet.objects.get(id=tweet_id) # Get the instance of from the database using the parameter
     user = request.user.profile # Get the instance of user profile assigned to the authenticated logged in user
     tweet_user = tweet.user.id # Extract the ID of the user assigned to the tweet
     msg = request.POST.get('tweet_msg') # Get the updated tweet message

     if user.id == tweet_user: # Allow the request only if the user profile matches the assigned user to the tweet
         tweet.msg = msg # Replace the tweet message (msg fielf) with the updated message
         tweet.save() # Save the changes
         return redirect('/tweets/all-tweets')
twitterclone/tweets/urls.py
urlpatterns = [ path('all-tweets', views.AllTweets.as_view(), name='all-tweets'), path('delete-tweet/<id>', views.deleteTweet, name='delete-tweet'), path('edit-tweet/<id>', views.EditTweet.as_view(), name='edit-tweet'), ] -
We can now create our
update-tweet.htmltemplate and bind it to our previously created view. We will also utilize Jinja templates to display an error message in case non-tweet owner users try to access the unique page. You may simply copy the code below:twitterclone/tweets/templates/tweets/update-tweet.html
```html {% extends ‘tweets/base.html’ %} {% load static %}
{% block title %} Twitter Clone | Update Tweet {% endblock %}
{% block content %}
{% if user.profile.id == tweet_id %}
Edit this tweet
{% else %}
Error 404: Page not found
{% endif %}
{% endblock %}
   Your updated local directory should look similar to this:

   ```bash
   twitterclone/
   |__ accounts/
   |   |__ __pycache__/
   |   |__ migrations/
   |   |__ accounts/
   |   |   |__ templates/
   |   |       |__ base.html
   |   |       |__ login.html
   |   |       |__ register.html
   |   |       |__ registration-success.html
   |   |__ __init__.py
   |   |__ admin.py
   |   |__ apps.py
   |   |__ decorators.py
   |   |__ forms.py
   |   |__ models.py
   |   |__ tests.py
   |   |__ urls.py
   |   |__ views.py
   |__ static/
   |   |__ css/
   |       |__ index.css
   |   |__ img/
   |   |__ js/
   |__ tweets/
   |   |__ __pycache__/
   |   |__ migrations/
   |   |__ tweets/
   |   |   |__ templates/
   |   |       |__ all-tweets.html
   |   |       |__ base.html
   |   |       |__ update-tweet.html
   |   |__ __init__.py
   |   |__ admin.py
   |   |__ apps.py
   |   |__ models.py
   |   |__ tests.py
   |   |__ urls.py
   |   |__ views.py
   |__ twitterclone/
   |   |__ __pycache__/
   |   |__ __init__.py
   |   |__ .env
   |   |__ asgi.py
   |   |__ settings.py
   |   |__ urls.py
   |   |__ wsgi.py
   |__ .gitignore
   |__ db.sqlite3
   |__ manage.py
-
All we have to do now is to update our
all-tweets.htmltemplate to assign the correspondinghrefvalue for the edit links. Find the link tag assigned for edit redirection (theatag inside the commentEdit) and follow the updated code below:<!-- Edit --> <!-- href is now assigned with a dynamic link entry --> <a href="/tweets/edit-tweet/{{ tweet.id }}" style="background: none; border: none;" > <i class="iconBtn fa fa-pencil-square-o fa-3" aria-hidden="true"></i> </a> <!-- End Edit -->
Password reset via email
Now that the main features of our project has been taken care of, we can now proceed on doing some additional features that will better enhance the overall functionality of the project and the user experience. In this section, we will discuss how to implement a password reset functionality, in case a user forgot the credentials to his/her account. We will be discussing how to connect an SMTP server such as Gmail to send an email containing instructions and unique password reset links.
-
For this functionality, we will be using the built-in password reset views from Django’s authentication library. All we need to do later on is to configure the settings and prepare the templates, as well as the assignment of URL paths to each of the view. For now, import the Django authentication library and add the necessary views with specific paths in
urls.pyof the accounts app. You may follow the code below:twitterclone/accounts/urls.py
... from django.contrib.auth import views as auth_views ... urlpatterns = [ path('', views.Login.as_view(), name='login'), path('register/', views.Register.as_view(), name='register'), path('registration-success/', views.RegistrationSuccess.as_view(), name='registration-success'), path('logout/', views.logoutUser, name='logout'), path('reset-password/', auth_views.PasswordResetView.as_view(), name="reset_password"), # Dedicated view for users to input their email path('reset-password-sent/', auth_views.PasswordResetDoneView.as_view(), name="password_reset_done"), # View indicating that the email containing instructions has been sent path('reset-password-confirm/<uidb64>/<token>', auth_views.PasswordResetConfirmView.as_view(), name="password_reset_confirm"), # A unique URL for the user with a unique token that takes the updated password path('reset-password-complete/', auth_views.PasswordResetCompleteView.as_view(), name="password_reset_complete"), # Dedicated view for confirming that the password reset was completed successfully ] -
The next thing to do is to configure
settings.pywith SMTP configuration. To accomplish this functionality, we need a dedicated Gmail account with Less secured apps setting enabled. For now, we will add the necessary configuration inside thesettings.pyfile and assign the values to environmental variables (since this will be containing credentials). Open thesettings.pyfile and add the following lines of code at the bottom part.twitterclone/twitterclone/settings.py
# SMTP Configuration EMAIL_BACKEND = 'django.core.mail.backends.smtp.EmailBackend' EMAIL_HOST = config('EMAIL_HOST') EMAIL_PORT = config('EMAIL_PORT') EMAIL_USE_TLS = config('EMAIL_USE_TLS') EMAIL_HOST_USER = config('EMAIL_HOST_USER') EMAIL_HOST_PASSWORD = config('EMAIL_HOST_PASSWORD') -
Open your
.envfile and add the variables with their corresponding values.twitterclone/twitterclone/.env
EMAIL_HOST=smtp.gmail.com
EMAIL_PORT=587
EMAIL_USE_TLS=True
EMAIL_HOST_USER=your@email.com
EMAIL_HOST_PASSWORD=yourpassword
Note: Make sure that there are no spaces in between the equal signs of each variable and value.
-
This feature will not work unless you allow access for less secure apps in the Gmail account you have used. Login to the gmail account you have configured inside
settings.pyand proceed on enabling “Less secure app access”. This setting can be found in this link.Note: If you are using multiple Gmail accounts in your computer, be sure that your are configuring the Gmail account you use for this project. The ideal way is to login to your account in a private tab (incognito) to ensure that it is the only account logged in in the browser’s instance.
-
You may now check if the functionality is working by heading over to http://127.0.0.1:8000/reset-password to try and reset an account password with valid email. The email sent should contain the account username and a link to change password.
Note: Be sure to check the spam folder for email as the email might be recognized as a spam.
-
The password reset feature is now functional but there are still alot to improve. For instance, the login link at the end password reset success page does not link properly to our set login URL path (
/). Furthermore, its design is very generic to Django’s styling and does not look like the overall style of our web application, which might confuse users. To solve this issue, we will be creating our own templates, and bind each of them to the views. Create an HTML file for each view inside the accounts app templates directory (twitterclone/accounts/templates/accounts/). You may follow the code below for each HTML file and their respective contents.twitterclone/accounts/templates/accounts/reset-password.html
{% extends 'accounts/base.html' %}
{% load static %}

{% block title %}
Twitter Clone | Reset Password
{% endblock %}

{% block content %}
<div>
  <div class="container">
    <div class="row">
      <div class="col-sm-9 col-md-7 col-lg-5 mx-auto">
        <div class="card card-signin my-5">
          <div class="card-body">
            <h3 class="text-center">Reset Password</h3>
            <br />

            <form class="form-signin" method="POST">
              {% csrf_token %}

              <div class="row">
                <div class="form-label-group">
                  {{ form.email }}
                  <label for="id_email">Email</label>
                </div>
              </div>

              <button
                name="Reset Password"
                class="btn text-uppercase"
                type="submit"
                style="width: 100%;"
              >
                Reset Password
              </button>
              <br />
              {% if form.errors %}
               {% for field in form %}
                 {% for error in field.errors %}
                 <div class="alert alert-danger my-3">
                   <strong>{{ error|escape }}</strong>
                 </div>
                 {% endfor %}
               {% endfor %}
              {% else %}
              <br />
              {% endif %}
              <hr class="my-4" />
              <p class="text-center">
                Remember your account?
                <a href="{% url 'login' %}" style="text-decoration: none;"
                  >Login</a
                >
              </p>
            </form>
          </div>
        </div>
      </div>
    </div>
  </div>
</div>

<script>
  const email = document.querySelector('input[name="email"');
  email.classList.add("form-control");
</script>

{% endblock %}
twitterclone/accounts/templates/accounts/reset-password-sent.html
{% extends 'accounts/base.html' %}
{% load static %}

{% block title %}
Twitter Clone | Password Reset Instructions Sent
{% endblock %}

{% block content %}
<div>
  <div class="container">
    <div class="row">
      <div class="col-sm-9 col-md-7 col-lg-5 mx-auto">
        <div class="card card-signin my-5">
          <div class="card-body">
            <h3 class="text-center">Password Reset Instructions Sent!</h3>
            <br />

            <form class="form-signin">
              <div class="row">
                <div class="form-label-group" style="text-align: center">
                  <p>
                    You may now check your email for instructions on how to
                    properly reset your password.
                  </p>
                </div>
              </div>

              <a
                name="Go home"
                class="btn text-uppercase"
                href="{% url 'login' %}"
                style="width: 100%;"
                >Return to Login</a
              >
              <hr class="my-4" />
            </form>

            <p class="text-center">
              Remember your account?
              <a href="{% url 'login' %}" style="text-decoration: none;"
                >Login</a
              >
            </p>
          </div>
        </div>
      </div>
    </div>
  </div>
</div>

{% endblock %}
twitterclone/accounts/templates/accounts/reset-password-confirm.html
{% extends 'accounts/base.html' %}
{% load static %}

{% block title %}
Twitter Clone | Password Reset Form
{% endblock %}

{% block content %}
{% if validlink %}

<div>
  <div class="container">
    <div class="row">
      <div class="col-sm-9 col-md-7 col-lg-5 mx-auto">
        <div class="card card-signin my-5">
          <div class="card-body">
            <h3 class="text-center">Reset Password</h3>
            <br />

            <form class="form-signin" method="POST">
              {% csrf_token %}

              <div class="row">
                <div class="form-label-group">
                  {{ form.new_password1 }}
                  <label for="new_password">Enter your new password</label>
                </div>
              </div>

              <div class="row">
                <div class="form-label-group">
                  {{ form.new_password2 }}
                  <label for="new_password2"
                    >Confirm your new password</label
                  >
                </div>
              </div>

              <button
                name="Reset Password"
                class="btn text-uppercase"
                type="submit"
                style="width: 100%;"
              >
                Confirm Password Reset
              </button>

              {% if form.errors %}
               {% for field in form %}
                 {% for error in field.errors %}
                 <div class="alert alert-danger my-3">
                   <strong>{{ error|escape }}</strong>
                 </div>
                 {% endfor %}
               {% endfor %}
              {% else %}
              <br />
              {% endif %}

              <hr class="my-4" />
              <p class="text-center">
                Remember your account?
                <a href="{% url 'login' %}" style="text-decoration: none;"
                  >Login</a
                >
              </p>
            </form>
          </div>
        </div>
      </div>
    </div>
  </div>
</div>

<script>
  const pass = document.querySelectorAll('input[type="password"]');
  pass.forEach((e) => {
    e.classList.add("form-control");
  });
</script>

{% else %}

<div>
  <div class="container">
    <div class="row">
      <div class="col-sm-9 col-md-7 col-lg-5 mx-auto">
        <div class="card card-signin my-5">
          <div class="card-body">
            <h3 class="text-center">Password Reset Unsuccessful</h3>
            <br />

            <form class="form-signin">
              <div class="row">
                <div class="form-label-group" style="text-align: center">
                  <p>
                    This password reset link is invalid. This might be
                    possible because the link has already been used. Please
                    request a new password reset form.
                  </p>
                </div>
              </div>

              <a
                name="Go home"
                class="btn text-uppercase"
                href="{% url 'reset_password' %}"
                style="width: 100%;"
                >Reset Password Again</a
              >
              <hr class="my-4" />
            </form>

            <p class="text-center">
              Remember your account?
              <a href="{% url 'login' %}" style="text-decoration: none;"
                >Login</a
              >
            </p>
          </div>
        </div>
      </div>
    </div>
  </div>
</div>

{% endif %}

{% endblock %}
twitterclone/accounts/templates/accounts/reset-password-complete.html
{% extends 'accounts/base.html' %} {% load static %} {% block title %} Twitter Clone | Password Reset Complete {% endblock %} {% block content %} <div> <div class="container"> <div class="row"> <div class="col-sm-9 col-md-7 col-lg-5 mx-auto"> <div class="card card-signin my-5"> <div class="card-body"> <h3 class="text-center">Password Reset Complete!</h3> <br /> <form class="form-signin"> <div class="row"> <div class="form-label-group" style="text-align: center"> <p> You may now login to your account with your new password. </p> </div> </div> <a name="Go home" class="btn text-uppercase" href="{% url 'login' %}" style="width: 100%;" >Return to Login</a > <hr class="my-4" /> </form> <p class="text-center"> Don't have an account yet? <a href="{% url 'register' %}" style="text-decoration: none;" >Sign Up</a > </p> </div> </div> </div> </div> </div> </div> {% endblock %} -
To be able to use the templates we created, we need to update the URL paths for each view by specifiying the names of the corresponding template for each using the
template_nameparameter inside theas_view()method:twitterclone/accounts/urls.py
urlpatterns = [ path('', views.Login.as_view(), name='login'), path('register/', views.Register.as_view(), name='register'), path('registration-success/', views.RegistrationSuccess.as_view(), name='registration-success'), path('logout/', views.logoutUser, name='logout'), path('reset-password/', auth_views.PasswordResetView.as_view(template_name="accounts/reset-password.html"), name="reset_password"), path('reset-password-sent/', auth_views.PasswordResetDoneView.as_view(template_name="accounts/reset-password-sent.html"), name="password_reset_done"), path('reset-password-confirm/<uidb64>/<token>', auth_views.PasswordResetConfirmView.as_view(template_name="accounts/reset-password-confirm.html"), name="password_reset_confirm"), path('reset-password-complete/', auth_views.PasswordResetCompleteView.as_view(template_name="accounts/reset-password-complete.html"), name="password_reset_complete"), ] -
In order for users to easily locate this feature, update the
login.htmltemplate and add a hyperlink that redirects to the password reset page. Add a “Forgot you password?” link just above the sign up instruction.twitterclone/accounts/templates/accounts/login.html
<p class="text-center"> <a href="{% url 'reset_password' %}" style="text-decoration: none;" >Forgot your password?</a > </p> -
You may now check the password reset functionality again with the new templates applied.
(twtclone)$ python manage.py runserver
File Upload (Image) and user profile editing
For better user experience, the user profile may be modified by adding a profile image.
-
Start by installing the Pillow library using
pip.(twtclone)$ pip install pillow -
Up next is modifying the model for user profile. Head over to the accounts app sub directory (
twitterclone/accounts/) and openmodels.py. Proceed on adding a new field for profile picture. You may follow the code below.twitterclone/accounts/models.py
class Profile(models.Model): user = models.OneToOneField(User, null=True, on_delete=models.CASCADE) first_name = models.CharField(max_length=200, null=True) last_name = models.CharField(max_length=200, null=True) username = models.CharField(max_length=200, null=True) email = models.CharField(max_length=200, null=True) date_created = models.DateTimeField(auto_now_add=True, null=True) profile_pic = models.ImageField(null=True, blank=True) # Add this field to add a profile image to profile. def __str__(self): return self.email -
Since a model has been changed again, run the commands for migration again.
(twtclone)$ python manage.py makemigrations (twtclone)$ python manage.py migrate -
Running the server again, you will notice upon logging in to the Admin Panel that an image upload field has been added to the Profile model. This however is still not useable since we still need to configure our media folder to store the uploaded images.
-
Open
settings.pyand add the following declarations at the end of the file for the root media directory and path. You may follow the code below.twitterclone/twitterclone/settings.py
... # Media MEDIA_ROOT = os.path.join(BASE_DIR, "media") MEDIA_URL = '/media/' -
Head over now to the base
urls.pyof the project and import the built-in settings library. Then, proceed on appending the media URL to theurlpatternsarray by following the code below (append the code at the end of the file).twitterclone/twitterclone/urls.py
... from django.conf import settings ... # Add this code at the last line of the file urlpatterns += static(settings.MEDIA_URL, document_root=settings.MEDIA_ROOT) -
Go to the Admin Panel and test if the image upload is working by adding profile pictures to an existing account. The image must be saved at the
/mediadirectory. -
To view the image in the web application, we will now modify the template for the AllTweets view. Go inside the templates directory of the tweets app (
twitterclone/tweets/templates/tweets) and open theall-tweets.htmlfile. Find the<img>tag with a class of tweet-profile-img. We will modify it to show the assigned user image instead. Follow the code below to check the modification on thealtandsrcattribute.twitterclone/tweets/templates/tweets/all-tweets.html
<!-- The src attribute is set with a conditional statement that checks if the user has a profile picture. If not, it will proceed on showing a generic image instead. --> <img class="tweet-profile-img my-auto" alt="{{ tweet.user.username }}" src="{% if tweet.user.profile_pic %}{{ tweet.user.profile_pic.url }}{% else %}https://icon-library.com/images/generic-user-icon/generic-user-icon-19.jpg{% endif %}" /> -
Create a preliminary view in the accounts app dedicated for profile update. Assign a dedicated URL path for it as well.
twitterclone/accounts/views.py
 class Profile(View):
 @method_decorator(login_required(login_url='/'))
 def get(self, request, *args, **kwargs):
     pass

 @method_decorator(login_required(login_url='/'))
 def post(self, request, *args, **kwargs):
     pass
twitterclone/accounts/urls.py
urlpatterns = [ path('', views.Login.as_view(), name='login'), path('register/', views.Register.as_view(), name='register'), path('registration-success/', views.RegistrationSuccess.as_view(), name='registration-success'), path('logout/', views.logoutUser, name='logout'), path('reset-password/', auth_views.PasswordResetView.as_view(template_name="accounts/reset-password.html"), name="reset_password"), path('reset-password-sent/', auth_views.PasswordResetDoneView.as_view(template_name="accounts/reset-password-sent.html"), name="password_reset_done"), path('reset-password-confirm/<uidb64>/<token>', auth_views.PasswordResetConfirmView.as_view(template_name="accounts/reset-password-confirm.html"), name="password_reset_confirm"), path('reset-password-complete/', auth_views.PasswordResetCompleteView.as_view(template_name="accounts/reset-password-complete.html"), name="password_reset_complete"), path('profile/', views.Profile.as_view(), name='profile'), # URL path for profile ] -
Next is to create a form for our profile model. This will allow us to better handle our forms with the requests and error checking rather than manually implementing them. Open
forms.pyfile from the accounts app subdirectory and follow the code below:twitterclone/accounts/forms.py
... from .models import * # Import the contents of models.py ... class ProfileForm(ModelForm): class Meta: model = Profile fields = '__all__' exclude = ['user'] def __init__(self, *args, **kwargs): super(ProfileForm, self).__init__(*args, **kwargs) self.fields['first_name'].widget.attrs.update( {'class': 'form-control', 'placeholder': 'First Name'}) self.fields['last_name'].widget.attrs.update( {'class': 'form-control', 'placeholder': 'Last Name'}) self.fields['email'].widget.attrs.update( {'class': 'form-control', 'placeholder': 'Email'}) self.fields['username'].widget.attrs.update( {'class': 'form-control', 'placeholder': 'username'}) -
Proceed now on creating a template for the profile render it through the get method of the Profile view. Add the corresponding functionalities as well with the post method. You may follow the code below.
twitterclone/accounts/views.py
...

from .forms import CreateUserForm, ProfileForm # Add Profie form among the form inputs
from .models import Profile as ProfileModel # To cope with the naming conflict, you may import the Profile model with a different name or you may change the name of the view completely.

...

class Register(View):
@method_decorator(unauthenticated_user)
def get(self, request, *args, **kwargs):
    form = CreateUserForm()
    return render(request, template_name='accounts/register.html', context={'form': form})

@method_decorator(unauthenticated_user)
def post(self, request, *args, **kwargs):
    form = CreateUserForm(request.POST)

    if form.is_valid():
        user = form.save()
        first_name = form.cleaned_data['first_name']
        last_name = form.cleaned_data['last_name']
        username = form.cleaned_data['username']
        email = form.cleaned_data['email']

        # Update this to profile model as well.
        profile = ProfileModel(user=user, first_name=first_name,
                               last_name=last_name, email=email, username=username)
        profile.save()
        return redirect('/registration-success/')
    else:
        messages.error(request, 'There was an error.')
    return render(request, template_name='accounts/register.html', context={'form': form})
...

class Profile(View):
@method_decorator(login_required(login_url='/'))
def get(self, request, *args, **kwargs):
    user = request.user
    profile = ProfileModel.objects.get(user=user)

    # Generate form from user instance
    form = ProfileForm(instance=profile)

    return render(request, template_name='accounts/profile.html', context={'form': form})

@method_decorator(login_required(login_url='/'))
def post(self, request, *args, **kwargs):
    user = request.user
    user_instance = ProfileModel.objects.get(user=user)
    account_instance = User.objects.get(id=user.id)

    # accept form instance with file upload
    form = ProfileForm(request.POST, request.FILES, instance=user_instance)

    if form.is_valid():
        form.save()

        # Update the account model as well to sync both profile and account information
        first_name = form.cleaned_data['first_name']
        last_name = form.cleaned_data['last_name']
        username = form.cleaned_data['username']
        email = form.cleaned_data['email']

        account_instance.first_name = first_name
        account_instance.last_name = last_name
        account_instance.email = email
        account_instance.username = username

        account_instance.save()

        return render(request, template_name='accounts/profile.html', context={'form': form})
    else:
        messages.error(request, 'There was an error.')
    return render(request, template_name='accounts/profile.html', context={'form': form})
twitterclone/accounts/templates/accounts/profile.html
{% extends 'tweets/base.html' %} {% load static %} {% block title %} Twitter Clone | Tweets {% endblock %} {% block content %} <style> .nounderline { color: rgb(105, 199, 236); text-decoration: none; } .nounderline:hover { color: rgb(117, 235, 235); text-decoration: underline; } .signin { display: block; } .updateprofile { background-color: rgb(46, 118, 136) !important; } .updateprofile:hover { background-color: rgb(60, 135, 206) !important; } @media (max-width:480px) { .signin { margin: 0; display: flex; justify-content: center; width: 100%; } } </style> <div> <div class="container"> <div class="row"> <div class="col-lg-5"> <div class="card card-signin my-3"> <div class="card-body"> <h3 class="text-center">{% if user.profile.first_name|length > 0 %}{{ user.profile.first_name }} {{ user.profile.last_name }}{% else %}{{ user.username }}{% endif %}</h3> <div class="text-muted text-center" style="text-align: center;">@{{ user.profile.username }}</div> <br> <div class="form-signin"> <div class="form-label-group"> <div class="row"> <img class="profile-pic" src="{% if request.user.profile.profile_pic %}{{ request.user.profile.profile_pic.url }}{% else %}https://icon-library.com/images/generic-user-icon/generic-user-icon-19.jpg{% endif %}" /> </div> </div> <a class="btn text-uppercase text-white" href="/" style="width: 100%; font-weight: bold; border-radius: 0.5em;"><i class="fa fa-home fa-3" aria-hidden="true"></i> Go Back to Home</a> </div> </div> </div> </div> <div class="col-lg-7"> <div class="card card-signin my-3"> <div class="card-body"> <h3 class="text-center">Profile Information</h3> <div> <p class="text-muted" style="text-align: center;">Account was created on: {{ user.profile.date_created }}</p> </div> <hr> <br> <form class="form-signin" method="POST" enctype="multipart/form-data"> {% csrf_token %} <div class="form-label-group"> <div class="row"> <div class="col form-label-group"> {{ form.first_name }} <label for="id_first_name">First Name</label> </div> <div class="col form-label-group"> {{ form.last_name }} <label for="id_last_name">Last Name</label> </div> </div> <div class="row"> <div class="form-label-group"> {{ form.email }} <label for="id_email">Email</label> </div> </div> <div class="row"> <div class="form-label-group"> {{ form.username }} <label for="id_username">Username</label> </div> </div> <div class="row"> <div class="form-label-group"> <hr> <br> {% for i in form.profile_pic %} <div class="mb-2"> {{ i }} </div> {% endfor %} </div> </div> <hr class="my-3"> <button type="submit" class="btn text-uppercase updateprofile my-3" style="width: 100%;">Update Profile Information</button> </form> </div> </div> </div> </div> </div> </div> <script> const profile_pic = document.querySelector('input[name="profile_pic"'); profile_pic.classList.add('form-control-file'); </script> {% endblock %} -
Modify the base template from the tweets app as well for quick access on the profile page by linking it properly to the dedicated link tag in the navigation bar.
twitterclone/tweets/templates/tweets/base.html
<a class="nav-link menuItem" href="{% url 'profile' %}"> <i class="fa fa-user fa-3" aria-hidden="true"></i> Profile </a> -
You may now run the project again and check if the functionality is working properly.
(twtclone)$ python manage.py runserverYour updated local directory should look similar to this:
twitterclone/
|__ accounts/
|   |__ __pycache__/
|   |__ migrations/
|   |__ accounts/
|   |   |__ templates/
|   |       |__ base.html
|   |       |__ login.html
|   |       |__ register.html
|   |       |__ registration-success.html
|   |       |__ reset-password-complete.html
|   |       |__ reset-password-confirm.html
|   |       |__ reset-password-sent.html
|   |       |__ reset-password.html
|   |__ __init__.py
|   |__ admin.py
|   |__ apps.py
|   |__ decorators.py
|   |__ forms.py
|   |__ models.py
|   |__ tests.py
|   |__ urls.py
|   |__ views.py
|__ media/
|__ static/
|   |__ css/
|       |__ index.css
|   |__ img/
|   |__ js/
|__ tweets/
|   |__ __pycache__/
|   |__ migrations/
|   |__ tweets/
|   |   |__ templates/
|   |       |__ all-tweets.html
|   |       |__ base.html
|   |       |__ update-tweet.html
|   |__ __init__.py
|   |__ admin.py
|   |__ apps.py
|   |__ models.py
|   |__ tests.py
|   |__ urls.py
|   |__ views.py
|__ twitterclone/
|   |__ __pycache__/
|   |__ __init__.py
|   |__ .env
|   |__ asgi.py
|   |__ settings.py
|   |__ urls.py
|   |__ wsgi.py
|__ .gitignore
|__ db.sqlite3
|__ manage.py
User timelines using dynamic routing
Another feature to finish of the project is to assign a specific timeline pages for each user. This page will display some profile information about the user followed by his/her latest “tweets”.
-
In the tweets app subdirectory, start by creating a preliminary view for user timeline and add a corresponding dynamic URL path which take the user ID as an argument. There is no need for a post method since this view will not be submitting anything. You may follow the code below.
twitterclone/tweets/views.py
 ...

 class UserTimeline(View):
 @method_decorator(login_required(login_url='/'))
 def get(self, request, *args, **kwargs):
     pass
twitterclone/tweets/urls.py
urlpatterns = [ path('all-tweets', views.AllTweets.as_view(), name='all-tweets'), path('delete-tweet/<id>', views.deleteTweet, name='delete-tweet'), path('edit-tweet/<id>', views.EditTweet.as_view(), name='edit-tweet'), path('user-timeline/<id>', views.UserTimeline.as_view(), name='user-timeline'), # Add a URL for the UserTimeline view ] -
Afterwards, proceed on creating a template for the view. Update the get method as well to assign the template on render and add the functionalities as well. You may follow the code below.
twitterclone/tweets/views.py
 ...

 class UserTimeline(View):
 @method_decorator(login_required(login_url='/'))
 def get(self, request, *args, **kwargs):
     profile_id = self.kwargs['id'] # Get the profile ID from the URL
     profile = Profile.objects.get(id=profile_id) # Get the profile instance using the ID
     tweets = Tweet.objects.filter(
         user=profile_id).order_by('-date_created') # Get all the tweets assigned to the user with the assigned ID
     return render(request, template_name='tweets/user-timeline.html', context={'profile': profile, 'tweets': tweets})
twitterclone/tweets/templates/tweets/user-timeline.html
{% extends 'tweets/base.html' %} {% load static %} {% block title %} Twitter Clone | {{ profile.username }}'s timeline {% endblock %} {% block content %} <style> .iconBtn { color: rgb(81, 91, 102); font-size: large; font-weight: 1000; } .iconBtn:hover { color: #2f98d4; } </style> <div class="container allTweets"> <div> <div class="card shadow mb-5 rounded border-0"> <div class="p-4"> <div class="container-fluid"> <div class="row"> <div class="col col"> <img class="my-auto" style="max-height: 10rem;" alt="{{ tweet.user.username }}" src="{% if profile.profile_pic %}{{ profile.profile_pic.url }}{% else %}https://icon-library.com/images/generic-user-icon/generic-user-icon-19.jpg{% endif %}" /> <h2 class="card-title"> {{ profile.first_name}} {{ profile.last_name}} </h2> <p class="text-muted" style="margin-top: -1em;"> @{{ profile.username }} </p> </div> <div class="col-10"> <h3>About</h3> <hr /> <p> <span class="text-muted" style="font-size: 0.8em;" >Account was created on {{ profile.date_created }}</span ><br /> <b>Name: </b>{{ profile.first_name}} {{ profile.last_name}}<br /> <b>Username: </b>{{ profile.username}}<br /> <b>Email: </b>{{ profile.email}} </p> <h3>Latest Tweet</h3> <hr /> <div> <p> <span class="text-muted" style="font-size: 0.8em;" >{{ tweets.first.date_created }}</span ><br /> {{ tweets.first }} </p> </div> </div> </div> </div> </div> <div class="card-body"></div> </div> </div> <div> <h1>{{ profile.first_name }} {{ profile.last_name }}'s Timeline</h1> <div class="container"> <!-- Cards --> {% for tweet in tweets %} <div class="card shadow mb-5 rounded border-0"> <div class="card-header text-white border-0" style="background-color: #2f98d4;" > <div class="row row-cols-auto"> <div class="col my-auto"> <img class="tweet-profile-img my-auto" alt="{{ tweet.user.username }}" src="{% if tweet.user.profile_pic %}{{ tweet.user.profile_pic.url }}{% else %}https://icon-library.com/images/generic-user-icon/generic-user-icon-19.jpg{% endif %}" /> </div> <div class="col my-auto"> <!-- Name --> <h4 class="my-auto"> {{ tweet.user.first_name }} {{ tweet.user.last_name }} </h4> <!-- End Name --> <!-- Username --> <span>@{{ tweet.user.username }}</span> <!-- End Username --> </div> </div> </div> <div class="card-body"> <p class="card-text text-wrap"> <!-- Date Created --> <span class="text-muted timestamp" >{{ tweet.date_created }}</span > <!-- End Date Created --> <br /> <!-- Message --> {{ tweet.msg }} <!-- End Message --> </p> <br /> <!-- User only --> {% if tweet.user.id == user.profile.id %} <div class="pull-right row row-cols-auto"> <div class="col"> <!-- Edit --> <a href="/tweets/edit-tweet/{{ tweet.id }}" style="background: none; border: none;" > <i class="iconBtn fa fa-pencil-square-o fa-3" aria-hidden="true" ></i> </a> <!-- End Edit --> </div> <div class="col"> <!-- Delete --> <form onsubmit="return confirm('Are you sure you want to delete the tweet: {{ tweet.msg }} ?');" method="POST" action="{% url 'delete-tweet' tweet.id %}" > {% csrf_token %} <button name="deletetweet" value="{{ tweet.id }}" type="submit" style="background: none; border: none;" > <i class="iconBtn fa fa-trash-o fa-3" aria-hidden="true" ></i> </button> </form> <!-- End Delete --> </div> </div> {% else %} <br /> {% endif %} <!-- End User only --> </div> </div> {% endfor %} <!-- End Cards --> </div> </div> </div> {% endblock %} -
For better implementation, update the
all-tweets.htmltemplate and enclose the name and username into a hyperlink that redirects to that user’s timeline. You may follow the code implementation below.twitterclone/tweets/templates/tweets/all-tweets.html
... <a href="/tweets/user-timeline/{{ tweet.user.id }}"> <img class="tweet-profile-img my-auto" alt="{{ tweet.user.username }}" src="{% if tweet.user.profile_pic %}{{ tweet.user.profile_pic.url }}{% else %}https://icon-library.com/images/generic-user-icon/generic-user-icon-19.jpg{% endif %}" /> </a> ... <a class="text-white" href="/tweets/user-timeline/{{ tweet.user.id }}" style="text-decoration: none;" > <!-- Name --> <h4 class="my-auto"> {{ tweet.user.first_name }} {{ tweet.user.last_name }} </h4> <!-- End Name --> <!-- Username --> <span>@{{ tweet.user.username }}</span> <!-- End Username --> </a> -
Proceed on properly modiying the
base.htmltemplate for the tweets app as well and link the brand header and the home tag to the All Tweets page (this may be declared as/since it automatically redirects totweets/all-tweetswhen the user is logged in as we have specified in the decorator). The timeline tag on other hand needs to be linked to the user’s timeline. You may follow the update for the code below.twitterclone/tweets/templates/tweets/all-tweets.html
<header class="navigationHeader sticky-top"> <nav class="navbar navbar-expand-lg navbar-dark bg-primary container-fluid" > <div class="container"> <!-- Link to / --> <a class="navbar-brand navBrand" href="/" >Twitter<span class="brand">CLONE</span></a > <button class="navbar-toggler" type="button" data-toggle="collapse" data-target="#navbarTogglerDemo02" aria-controls="navbarTogglerDemo02" aria-expanded="false" aria-label="Toggle navigation" > <span class="navbar-toggler-icon"></span> </button> <div class="collapse navbar-collapse align-items-center" id="navbarTogglerDemo02" > <ul class="nav navbar-nav ms-auto align-items-center"> <li class="nav-item"> <!-- Link to / --> <a class="nav-link menuItem" href="/" ><i class="fa fa-home fa-3" aria-hidden="true"></i> Home</a > </li> <li class="nav-item"> <!-- Link to user timeline --> <a class="nav-link menuItem" href="/tweets/user-timeline/{{ user.profile.id }}" ><i class="fa fa-newspaper-o fa-3" aria-hidden="true"></i> Timeline</a > </li> <li class="nav-item"> <a class="nav-link menuItem" href="{% url 'profile' %}" ><i class="fa fa-user fa-3" aria-hidden="true"></i> Profile</a > </li> <li class="nav-item"> <a class="nav-link menuItem" href="/logout" ><i class="fa fa-sign-out fa-3" aria-hidden="true"></i> Logout</a > </li> </ul> </div> </div> </nav> </header> </body> </html> -
As a finishing touch, you may proceed as well on adding a favicon to your web application pages. Simply add a favicon file in the
static/imgdirectory (in this case, the file used wasfavicon.png), and declare it as ashortcut iconin thebase.htmltemplates in both the accounts app and the tweets app, inside the<head>tag, just above the<title>tag.twitterclone/accounts/templates/accounts/base.html
<link
  rel="shortcut icon"
  type="image/png"
  href="{% static 'img/favicon.png' %}"
/>
twitterclone/tweets/templates/tweets/base.html
<link rel="shortcut icon" type="image/png" href="{% static 'img/favicon.png' %}" /> -
The project should be fully functional by now. All that is left to do is to get it ready for production. You may now proceed on running the project and testing all the functionalities implemented.
(twtclone)$ python manage.py runserverYour updated local directory should look similar to this:
twitterclone/
|__ accounts/
|   |__ __pycache__/
|   |__ migrations/
|   |__ accounts/
|   |   |__ templates/
|   |       |__ base.html
|   |       |__ login.html
|   |       |__ profile.html
|   |       |__ register.html
|   |       |__ registration-success.html
|   |       |__ reset-password-complete.html
|   |       |__ reset-password-confirm.html
|   |       |__ reset-password-sent.html
|   |       |__ reset-password.html
|   |__ __init__.py
|   |__ admin.py
|   |__ apps.py
|   |__ decorators.py
|   |__ forms.py
|   |__ models.py
|   |__ tests.py
|   |__ urls.py
|   |__ views.py
|__ media/
|__ static/
|   |__ css/
|       |__ index.css
|   |__ img/
|       |__ favicon.png
|   |__ js/
|__ tweets/
|   |__ __pycache__/
|   |__ migrations/
|   |__ tweets/
|   |   |__ templates/
|   |       |__ all-tweets.html
|   |       |__ base.html
|   |       |__ update-tweet.html
|   |       |__ user-timeline.html
|   |__ __init__.py
|   |__ admin.py
|   |__ apps.py
|   |__ models.py
|   |__ tests.py
|   |__ urls.py
|   |__ views.py
|__ twitterclone/
|   |__ __pycache__/
|   |__ __init__.py
|   |__ .env
|   |__ asgi.py
|   |__ settings.py
|   |__ urls.py
|   |__ wsgi.py
|__ .gitignore
|__ db.sqlite3
|__ manage.py
Preparing for deployment
In this section, we will be discussing some of the modifications to be made inside the settings.py directory before actual the actual deployment to Heroku.
-
By default, a Django web application allows only the localhost to connect. This is a security measure against attacks from malicious headers. This means however that we may need to selectively allow what hosts to be included. This would include the localhost itself and its loopback address, as well as the domain to be taken by the application. In this case, we will store the domain to the
.envfile so that we can easily change it in our production environment if we need to. Start by opening thesettings.pyfile and modify the entries inALLOWED_HOST. You may follow the code below:twitterclone/twitterclone/settings.py
ALLOWED_HOSTS = ['localhost','127.0.0.1',config('DOMAIN_NAME')] -
Next is to add the variable
DOMAIN_NAMEinside the.envfile. For now, just the value0.0.0.0on it. We will change this later to our acquired project domain.twitterclone/twitterclone/.env
DOMAIN_NAME=0.0.0.0Note: Make sure that there are no spaces in between the variable name, equal sign, and the value itself.
-
Since we will be deploying to
Heroku, there are a few conifgurations to be made with regards to the static and media files since Django does not support serving static files in production. Heroku however has a project called Whitenoise which we will incorporating to allow static files serving with our Heroku app. Firstly, install whitenoise usingpip.(twtclone)$ pip install whitenoise -
Next, add the declaration
'whitenoise.middleware.WhiteNoiseMiddleware'at the top ofMIDDLEWARE_CLASSESinsidesettings.py.twitterclone/twitterclone/settings.py
MIDDLEWARE = [ 'django.middleware.security.SecurityMiddleware', 'whitenoise.middleware.WhiteNoiseMiddleware', # Add it right here just below the security middleware 'django.contrib.sessions.middleware.SessionMiddleware', 'django.middleware.common.CommonMiddleware', 'django.middleware.csrf.CsrfViewMiddleware', 'django.contrib.auth.middleware.AuthenticationMiddleware', 'django.contrib.messages.middleware.MessageMiddleware', 'django.middleware.clickjacking.XFrameOptionsMiddleware', ] -
Finally, at the end of
settings.py, you may now add this line of code to enable gzip functionality.twitterclone/twitterclone/settings.py
STATICFILES_STORAGE = 'whitenoise.storage.CompressedManifestStaticFilesStorage' -
Next is to modify our database. By default, we have been using SQLite as our development databse. While SQLite has been a great development environment for us, it is not ideal for production. Moreover, Heroku does not support the use of SQLite database with Django applications. What we can do is to use our SQLite database during development, and comment them for production. What we will be using for production instead is a PostgreSQL which has a free addon in Heroku. In the
settings.py, locate the dedicated variableDATABASESholding a dictionary containing details for declaration of database. You may comment this out when pushing for production, but use them during development.twitterclone/twitterclone/settings.py
# Comment this out for production. Uncomment these lines in case you need to go back in development. # DATABASES = { # 'default': { # 'ENGINE': 'django.db.backends.sqlite3', # 'NAME': BASE_DIR / 'db.sqlite3', # } # } -
Afterwards, proceed on adding the necessary declaration for PostgreSQL database. We will be setting our database credentials as environmental variables. You may connect your empty (but initialized) PostgreSQL as well in your local machine, then declare the values for credentials using your
.envfile. Simply follow the code below:twitterclone/twitterclone/settings.py
# Comment this out during development. Uncomment these lines for production or if you are using a PostgreSQL database in your local machine during development. Just change the environmental variable values accordingly.
DATABASES = {
   'default': {
       'ENGINE': 'django.db.backends.postgresql_psycopg2',
       'NAME': config('DB_NAME'),
       'USER': config('DB_USER'),
       'PASSWORD': config('DB_PASSWORD'),
       'HOST': config('DB_HOST'),
       'PORT': config('DB_PORT'),
   }
 }
twitterclone/twitterclone/.env
 DB_NAME=your_database_name
 DB_USER=your_database_user
 DB_PASSWORD=your_database_password
 DB_HOST=your_database_host_or_localhost
 DB_PORT=your_database_port_or_default_at_5432
Note: Make sure that there are no spaces in between the variable name, equal sign, and the value itself. You may leave these variables as blank during development if you are using SQLite.
-
To allow connection to PostgreSQL however, another dependency needs to be installed. Proceed on installing psycopg2 via
pip. Proceed on installing the package gunicorn as well since we will be needing it during production (gunicorn will allow the application to run on multiple threads).(twtclone)$ pip install psycopg2 (twtclone)$ pip install gunicorn -
Afterwards, we will be installing another set of dependencies that will be used to store our media files. This is because Heroku is not a suitable platform for media files. However, it has an add-on that connects to Cloudinary which will grant us a free platform with certain limitations. For now, install
cloudinaryanddjango-cloudinary-storageviapip.(twtclone)$ pip install cloudinary (twtclone)$ pip install django-cloudinary-storage -
Next is to add
'cloudinary_storage'and'cloudinary'in the list ofINSTALLED_APPSinsettings.py. Follow the code below for proper placement.twitterclone/twitterclone/settings.py
... INSTALLED_APPS = [ 'django.contrib.admin', 'django.contrib.auth', 'django.contrib.contenttypes', 'django.contrib.sessions', 'django.contrib.messages', 'django.contrib.staticfiles', 'cloudinary_storage', # Add this line here 'cloudinary', # Add this line here as well. Be sure that these lines are below the staticfiles app. 'accounts', 'tweets', ] ... -
Afterwards proceed on adding the following lines of code towards the end of the
settings.pyfile, just above the configurations for the static directory. You may add the variables to your.envfile as well.twitterclone/twitterclone/settings.py
...
# Make sure these lines are above the declarations of variables for static directory
# Cloudinary
CLOUDINARY_STORAGE = {
    'CLOUD_NAME': config('CLOUDINARY_CLOUD_NAME'),
    'API_KEY': config('CLOUDINARY_API_KEY'),
    'API_SECRET': config('CLOUDINARY_API_SECRET'),
}

DEFAULT_FILE_STORAGE = 'cloudinary_storage.storage.MediaCloudinaryStorage'
Note: Like the PostgreSQL database, you may comment this out as well during development to use local storage.
twitterclone/twitterclone/.env
CLOUDINARY_CLOUD_NAME=cloud_name_indicated_in_the_account
CLOUDINARY_API_KEY=api_key_indicated_in_the_account
CLOUDINARY_API_SECRET=api_secret_indicated_in_the_account
CLOUDINARY_URL=cloudinary_url_indicated_in_the_account
Note: Make sure that there are no spaces in between the variable name, equal sign, and the value itself. You may leave these variables as blank during development if you are using your local storage. For proper values, refer to the instructions at the latter part of the tutorial.
-
Next is to create text files containing our dependencies. These are the packages we have installed using
pipfor our Django project. Luckily, we have been using a virtual environment. We can easily store these dependencies insiderequirements.txtby issuing the command below.(twtclone)$ pip freeze > requirements.txtThe contents of your
requirements.txtfile should look similar to this.asgiref==3.4.1 certifi==2021.5.30 charset-normalizer==2.0.3 cloudinary==1.26.0 Django==3.2.5 django-cloudinary-storage==0.3.0 gunicorn==20.1.0 idna==3.2 Pillow==8.3.1 psycopg2==2.9.1 python-decouple==3.4 pytz==2021.1 requests==2.26.0 six==1.16.0 sqlparse==0.4.1 urllib3==1.26.6 whitenoise==5.3.0 -
Create a file in the root of your project directory (
twitterclone/) as well namedruntime.txt. This is used to specify the specific Python version used for the development of the project. This is a great practice to ensure maximum compatibility with dependencies as we had during development using our local machine. In your terminal, issue the commandpython --versionto check which specific version of Python is installed.(twtclone)$ python --version Python 3.9.0In my case, the version installed was 3.9.0. Take note of this add that information inside the
runtime.txtfile. Follow the format below carefully (you may change the version number after the dash-to the specific Python version you used).twitterclone/runtime.txt
python-3.9.0 -
Afterwards, we will be needing another file called
Procfile. This will contain the necessary commands/instructions needed by Heroku to build our application. Simply copy the contents of the file below.twitterclone/Procfile
release: python manage.py migrate --no-input
web: gunicorn twitterclone.wsgi
Note: Make sure to specify the project name in the last line before the extension .wsgi. In this case, the project name is twitter clone, hence the file is specified as twitterclone.wsgi.
-
We are now ready with the necessary configurations. Your updated local directory should look similar to this:
twitterclone/
|__ accounts/
|   |__ __pycache__/
|   |__ migrations/
|   |__ accounts/
|   |   |__ templates/
|   |       |__ base.html
|   |       |__ login.html
|   |       |__ profile.html
|   |       |__ register.html
|   |       |__ registration-success.html
|   |       |__ reset-password-complete.html
|   |       |__ reset-password-confirm.html
|   |       |__ reset-password-sent.html
|   |       |__ reset-password.html
|   |__ __init__.py
|   |__ admin.py
|   |__ apps.py
|   |__ decorators.py
|   |__ forms.py
|   |__ models.py
|   |__ tests.py
|   |__ urls.py
|   |__ views.py
|__ media/
|__ static/
|   |__ css/
|       |__ index.css
|   |__ img/
|       |__ favicon.png
|   |__ js/
|__ tweets/
|   |__ __pycache__/
|   |__ migrations/
|   |__ tweets/
|   |   |__ templates/
|   |       |__ all-tweets.html
|   |       |__ base.html
|   |       |__ update-tweet.html
|   |       |__ user-timeline.html
|   |__ __init__.py
|   |__ admin.py
|   |__ apps.py
|   |__ models.py
|   |__ tests.py
|   |__ urls.py
|   |__ views.py
|__ twitterclone/
|   |__ __pycache__/
|   |__ __init__.py
|   |__ .env
|   |__ asgi.py
|   |__ settings.py
|   |__ urls.py
|   |__ wsgi.py
|__ .gitignore
|__ db.sqlite3
|__ manage.py
|__ Procfile
|__ requirements.txt
|__ runtime.txt
Deploying to Heroku
-
Head over to Heroku to create a new application. If you have not created an account yet, head over here.
-
In your dashboard click on New > Create new app.
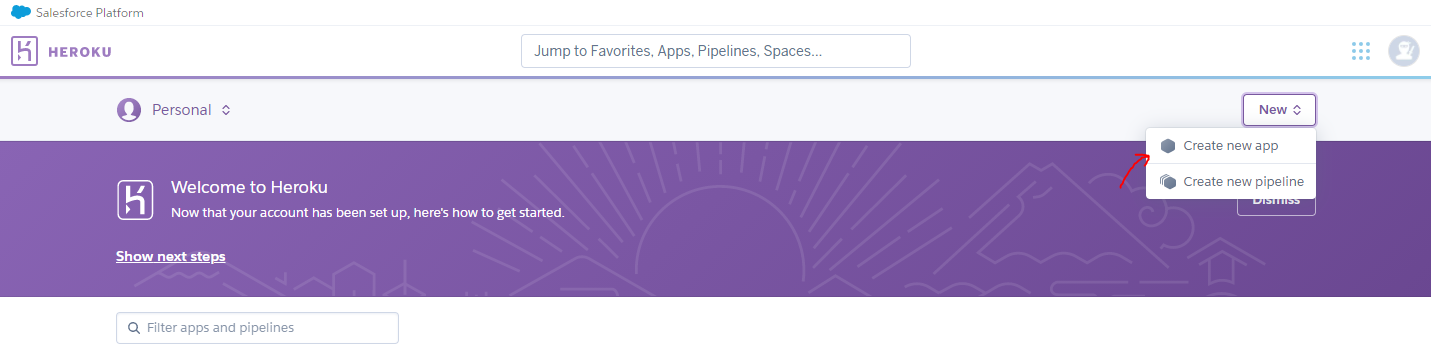
-
Specify an app name. Make sure it is not already taken.
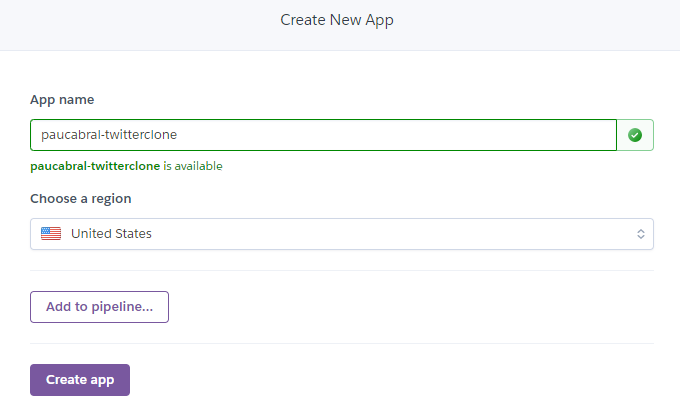
-
You will be greeted with the Deployment section after creating the app.
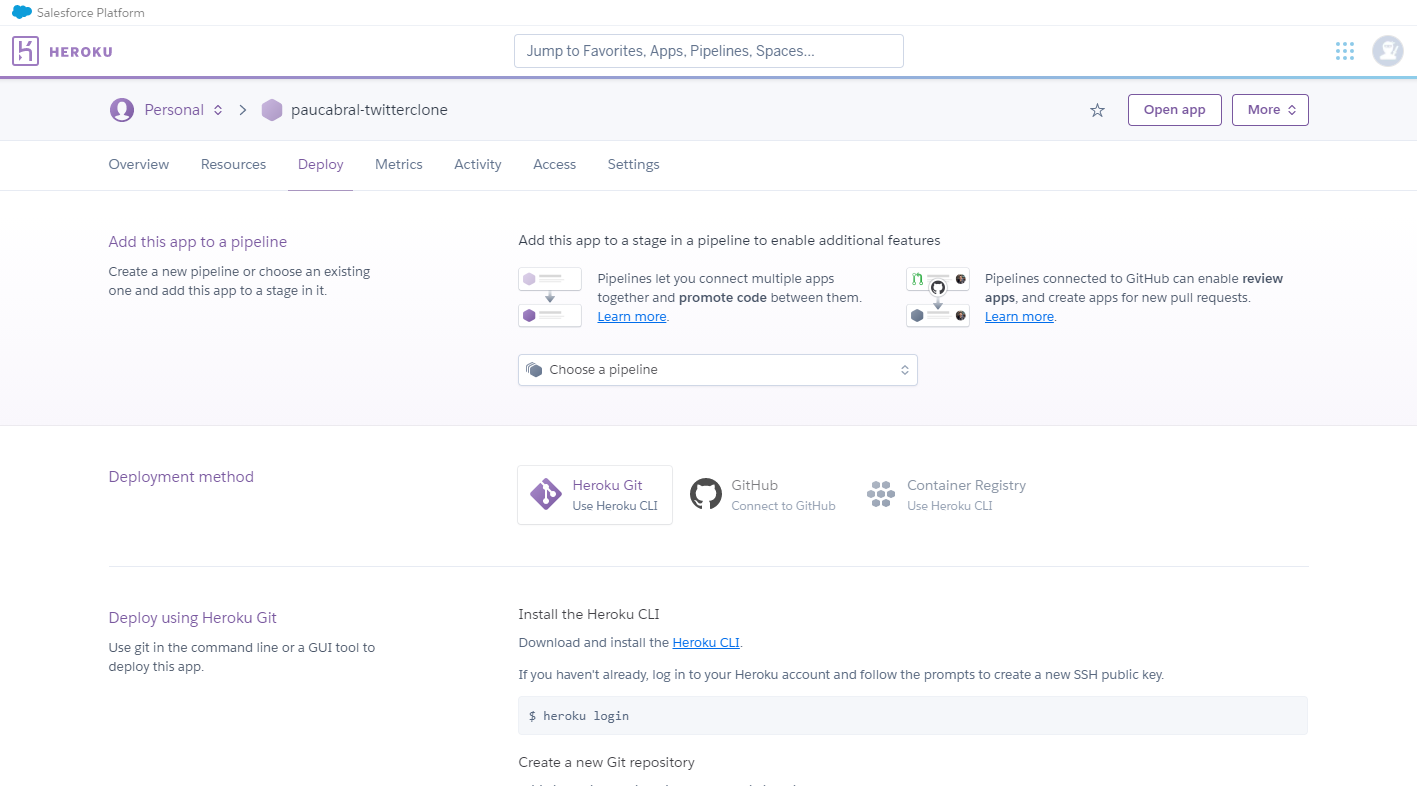
-
Leave the Deployment section for now and head over to the Resources section.
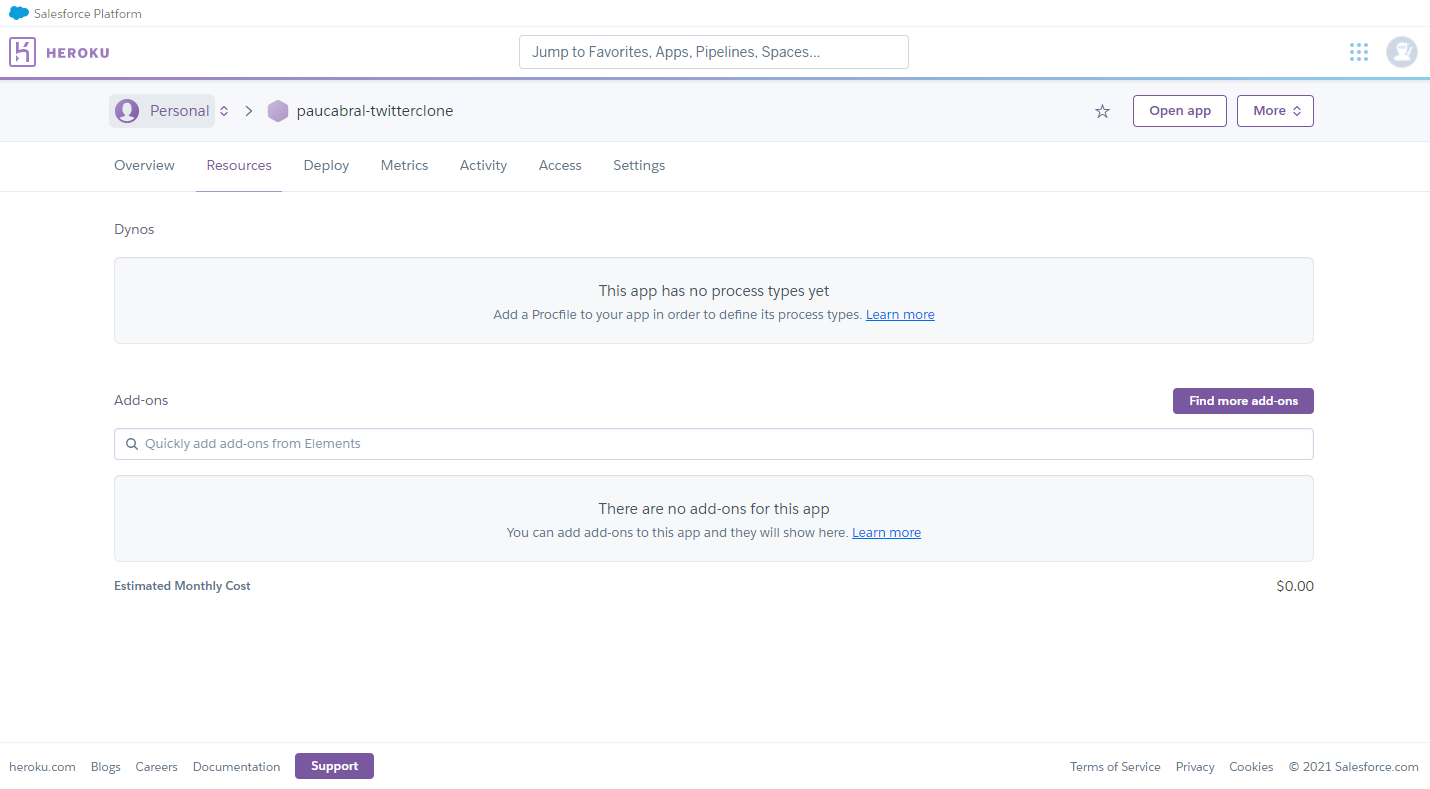
-
In the Add-ons search bar, go ahead and search Heroku Postgres, then click it.
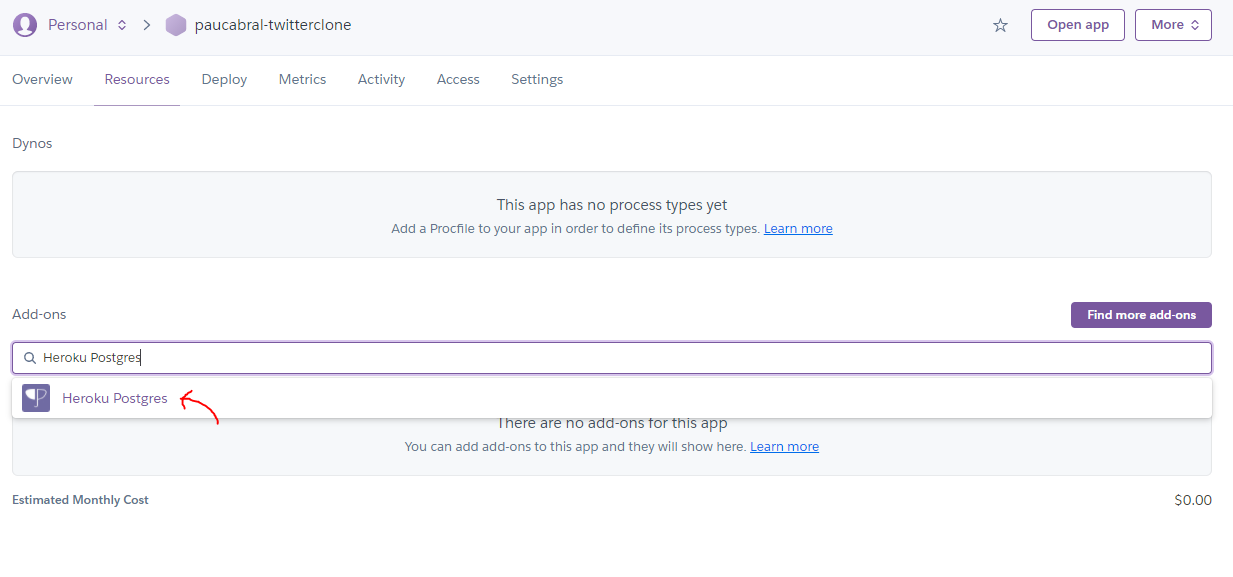
-
Select the Hobby Dev - Free plan to get the free tier add-on. While it has its limitations, it will be good enough for our project. Proceed on clicking Submit Order Form afterwards.
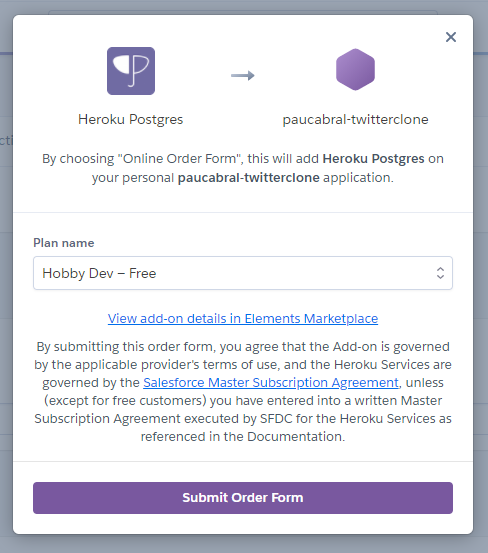
-
Heroku Postgres should now be present in the list add-ons.
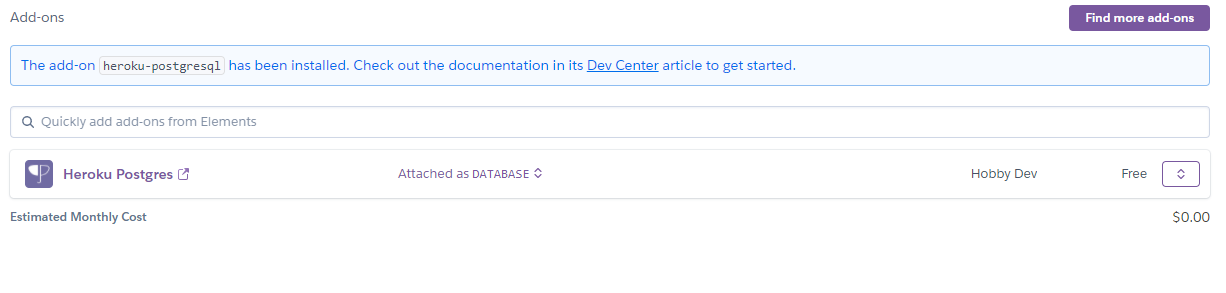
-
Click the Heroku Postgres link and you will be redirected to the interface for the database. You will be greeted with the Overview section indicating the number of connections to the database, number of row entries, tables, and the data size it is occupying.
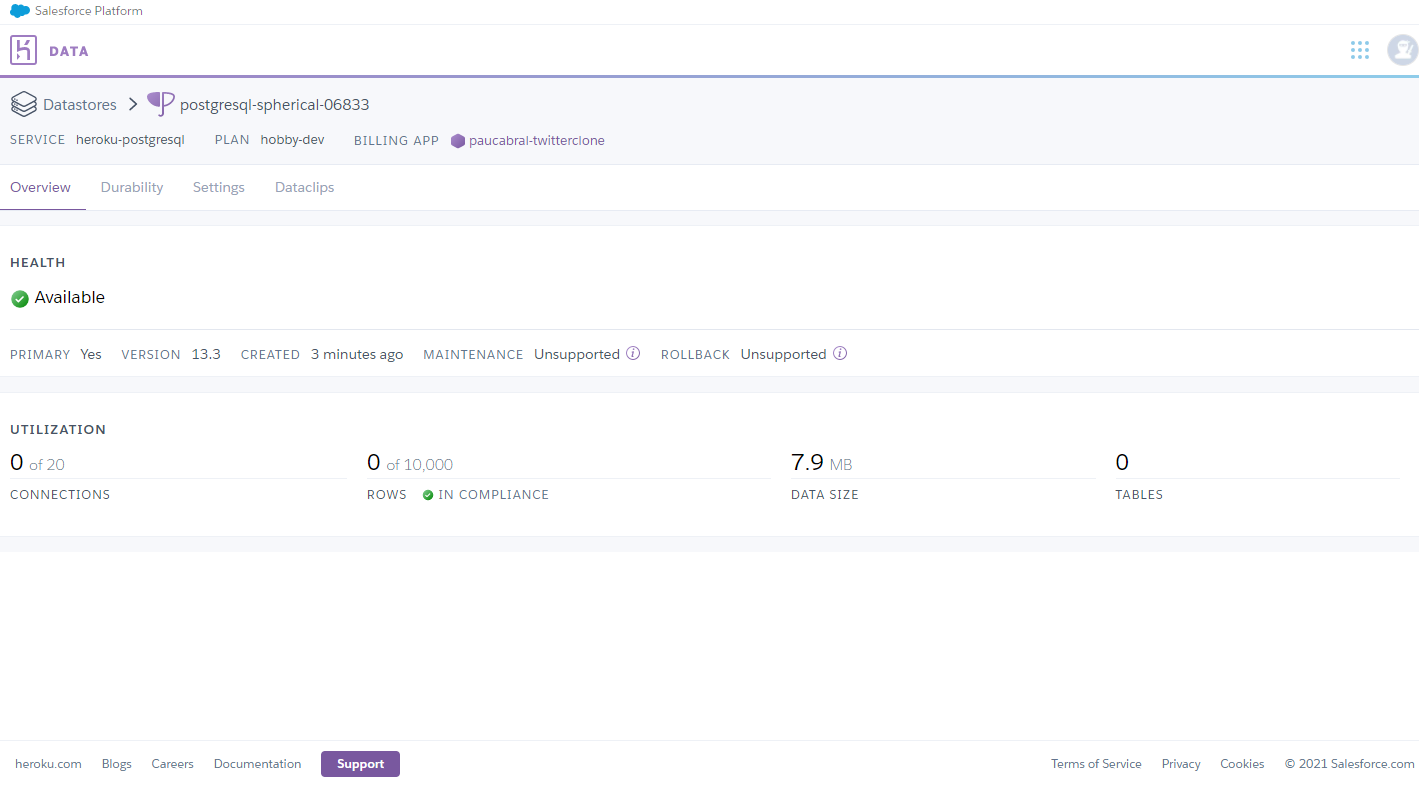
-
For now, head over to the the Settings section to see the database credentials.
-
Click on View Credentials…. It will then show the credentials for the database. Take note of these values as we will be declaring them in the environmental variables for our Heroku project.

Note: You may copy the credentials to your .env file if necessary to test remote connection from your local machine. -
This time, on a new tab, head over to Cloudinary and create an account.
-
Head to your Cloudinary dashboard and take note of the account credentials presented. You may added them to your local
.envfile for safekeeping as well.
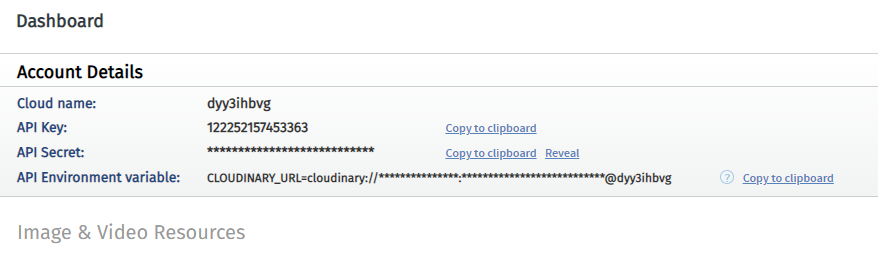
-
Head back to the page of your Heroku project then click on Settings.
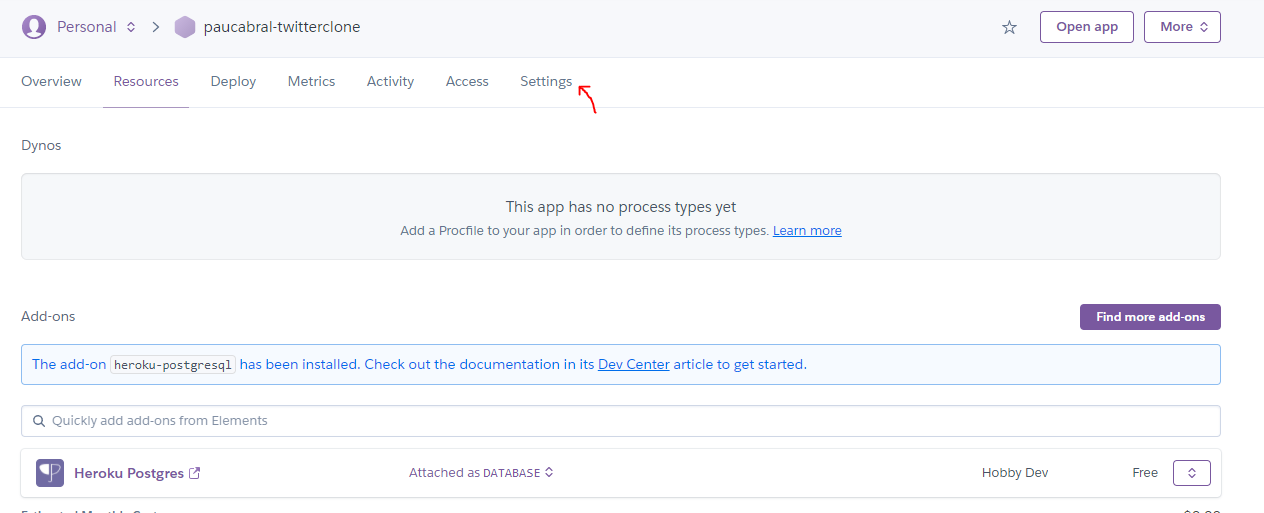
-
Scroll down and click on Reveal Config Vars. Proceed on adding the keys and values of the environmental variables declared inside your
.envfile. This is where the values found for the Heroku PostgreSQL database credentials and the Cloudinary accounts credentials will be added as well. Furthermore, do not forget to set theDEBUGvalue toFalsesince this will be a production environment. For theDOMAIN_NAMEon the other hand, set it to the domain of your project. This will be ‘name-of-project’.herokuapp.com. In this case, the name of my domain is paucabral-twitterclone.herokuapp.com.
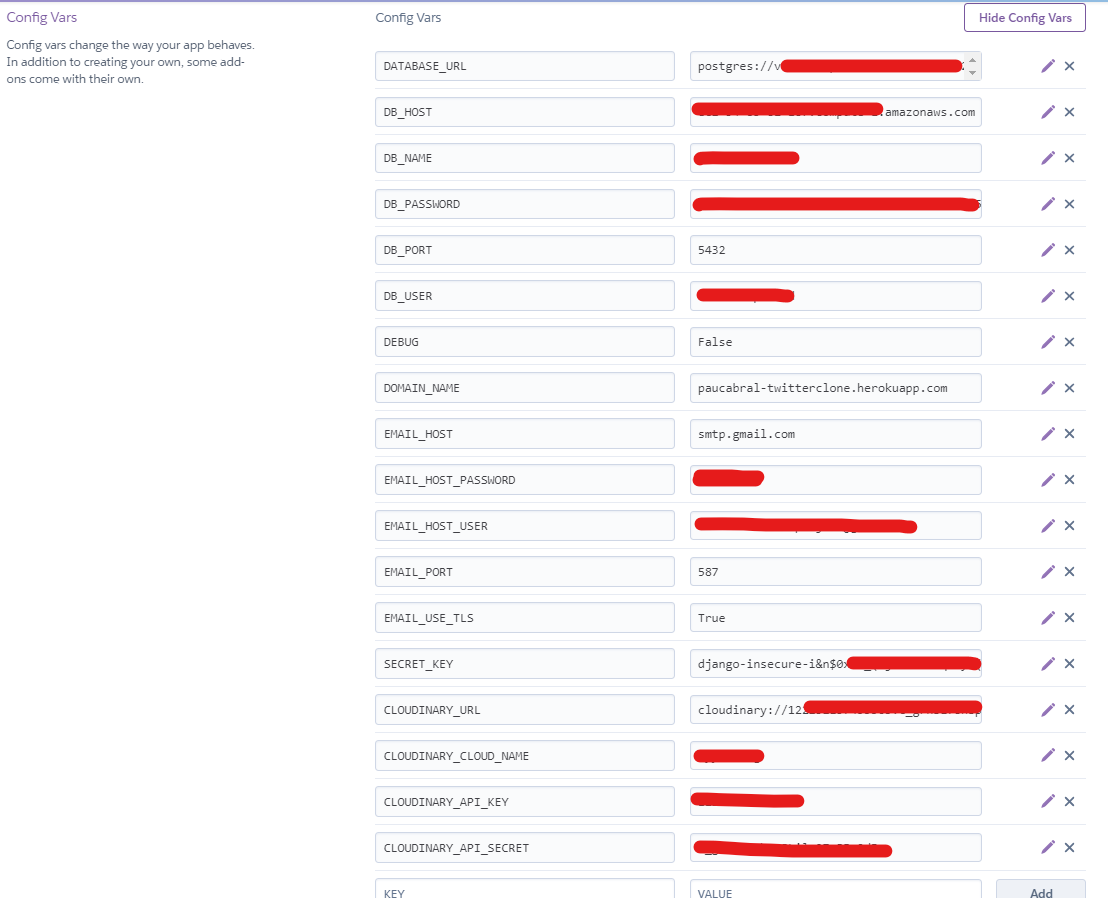
Note: Do not delete the first entry: DATABASE_URL. -
Just below the Config Vars section, you will see the Buildpacks section. Click on Add buildpack.
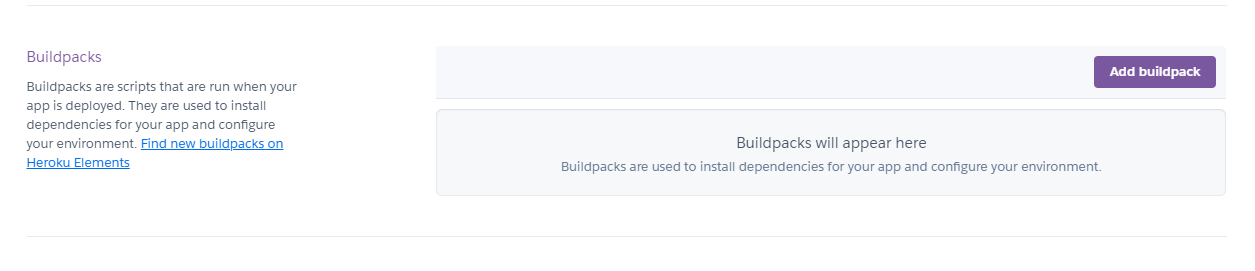
-
Select Python then click Save changes.
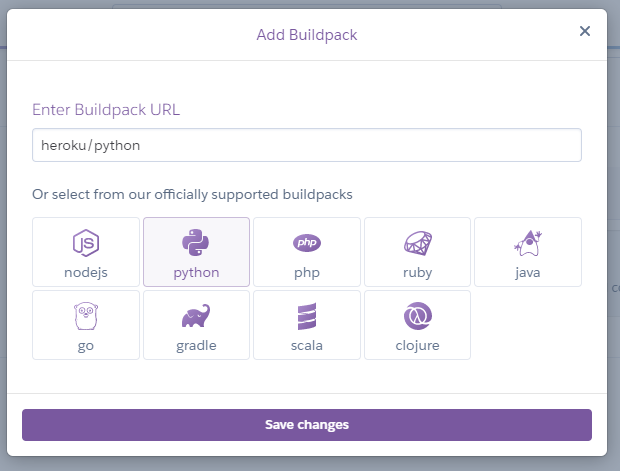
-
Finally, headback to the Deploy section of you Heroku application and select Github as the Deployment method. Search and select your project repository and click on Connect.
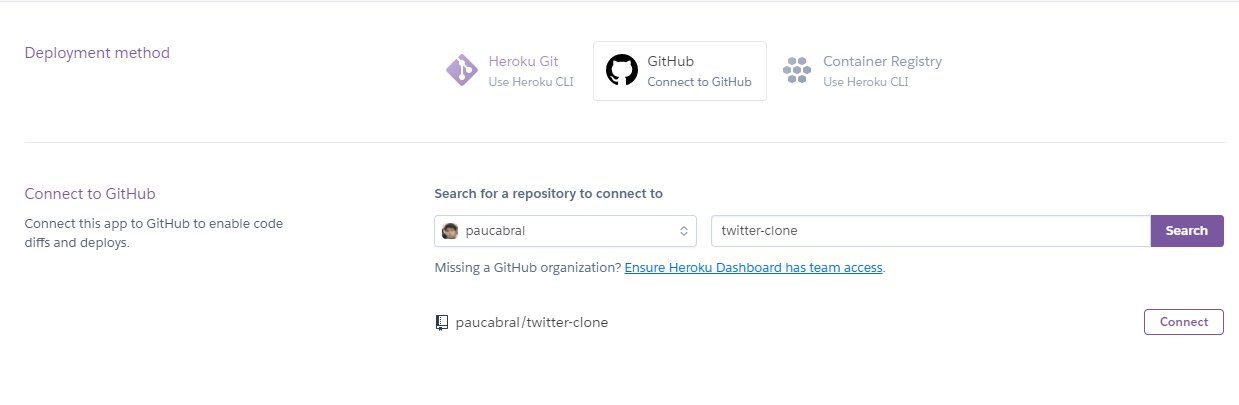
-
Select the main branch as the branch to deploy to in the Automatic deploys section. Click on Enable Automatic Deploys as well. This way, everytime we push our code into the main branch of our Github repository, it will automatically trigger the deployment of changes to Heroku.
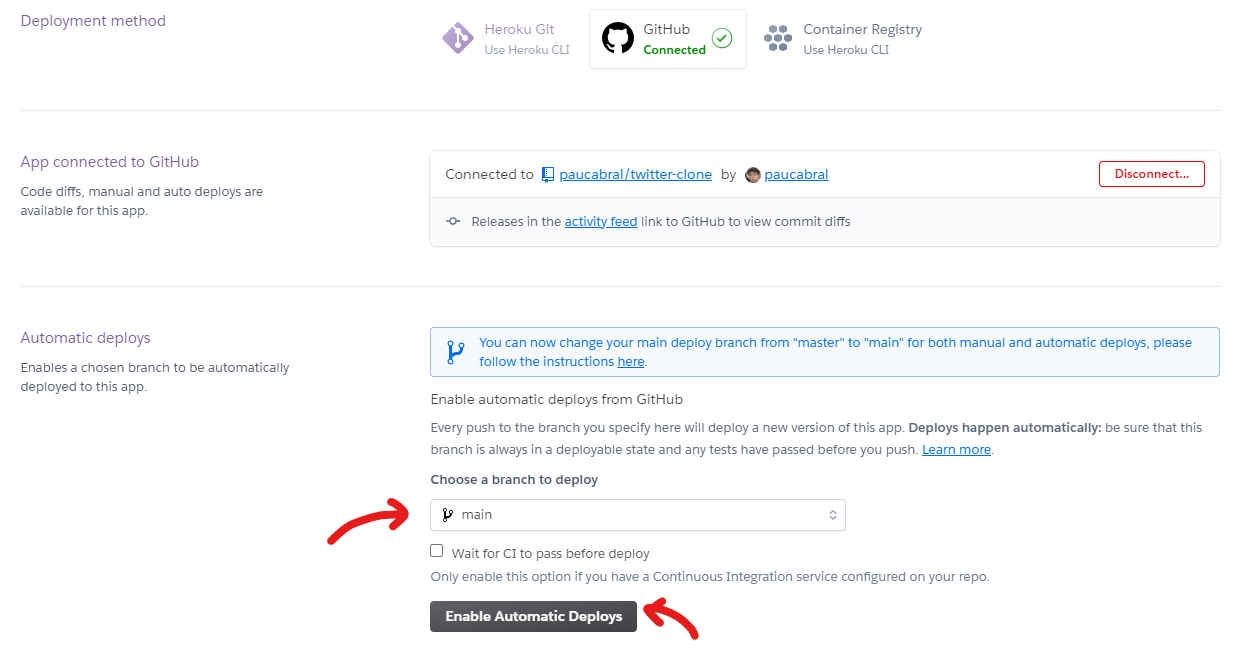
-
Now, save make sure to check your code once more and push it to your Github repository.
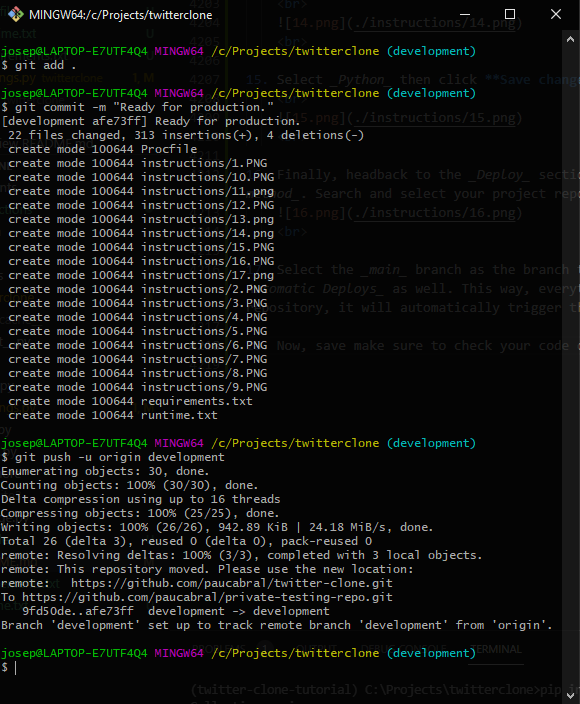
-
If you are using another branch (like me as stated in the earlier instructions), issue a pull request in your Github repository and merge the changes.
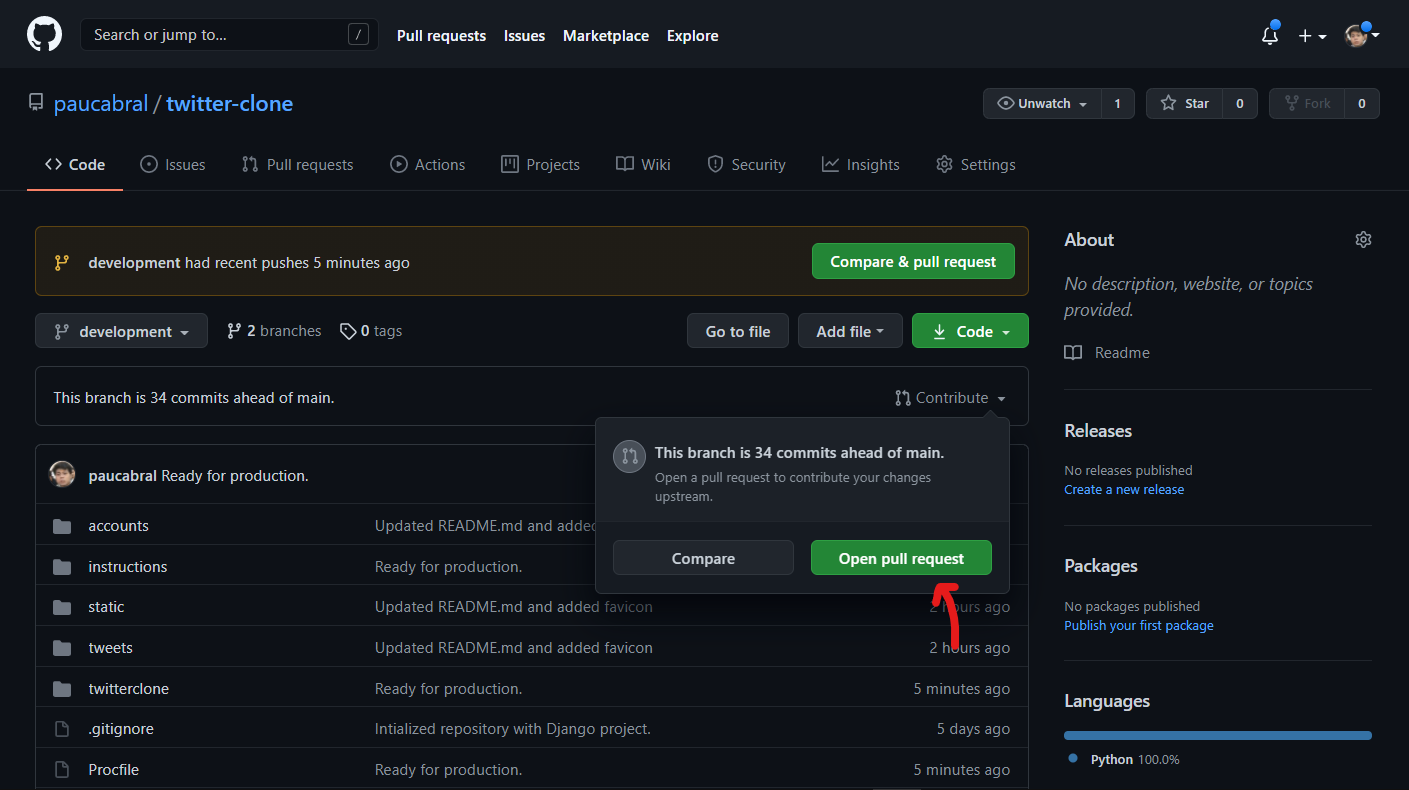
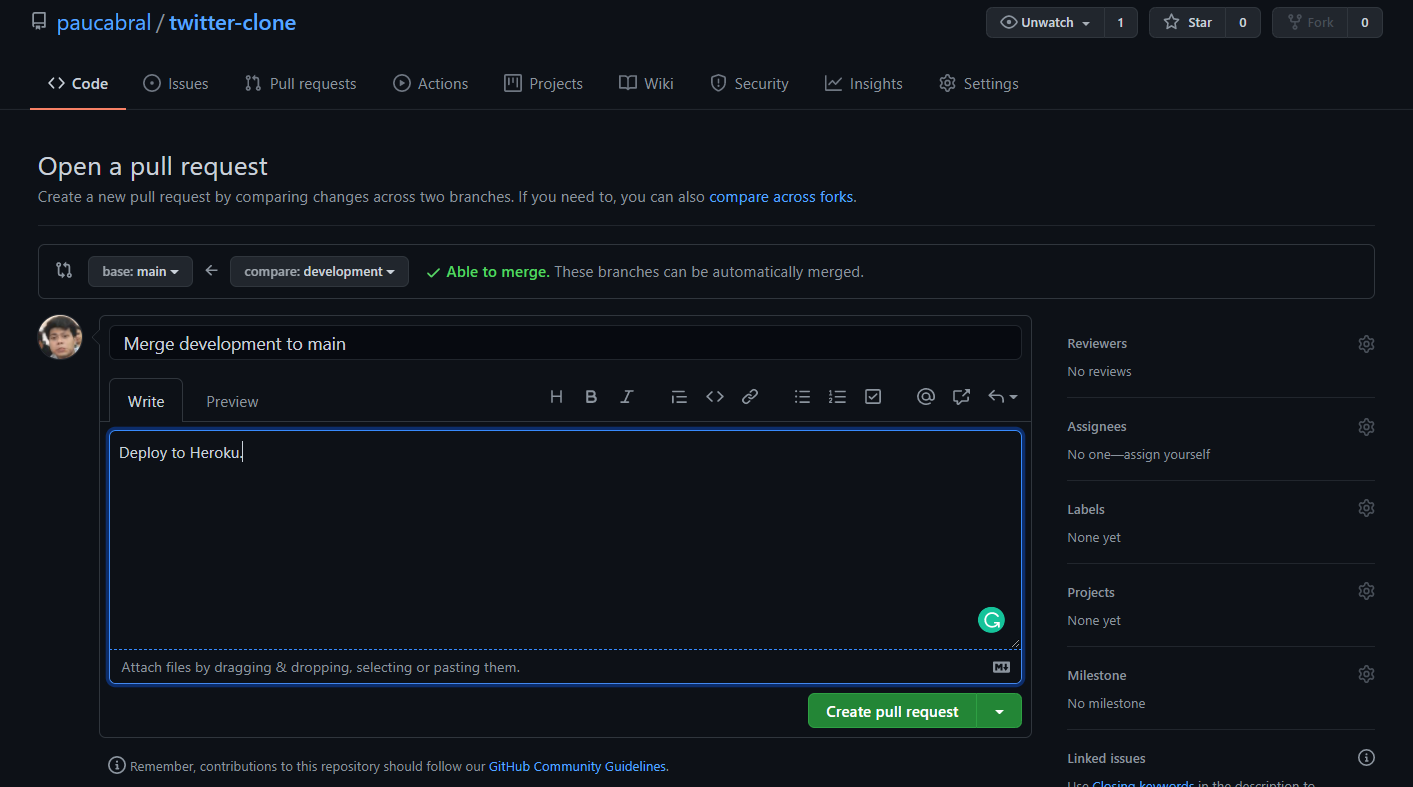
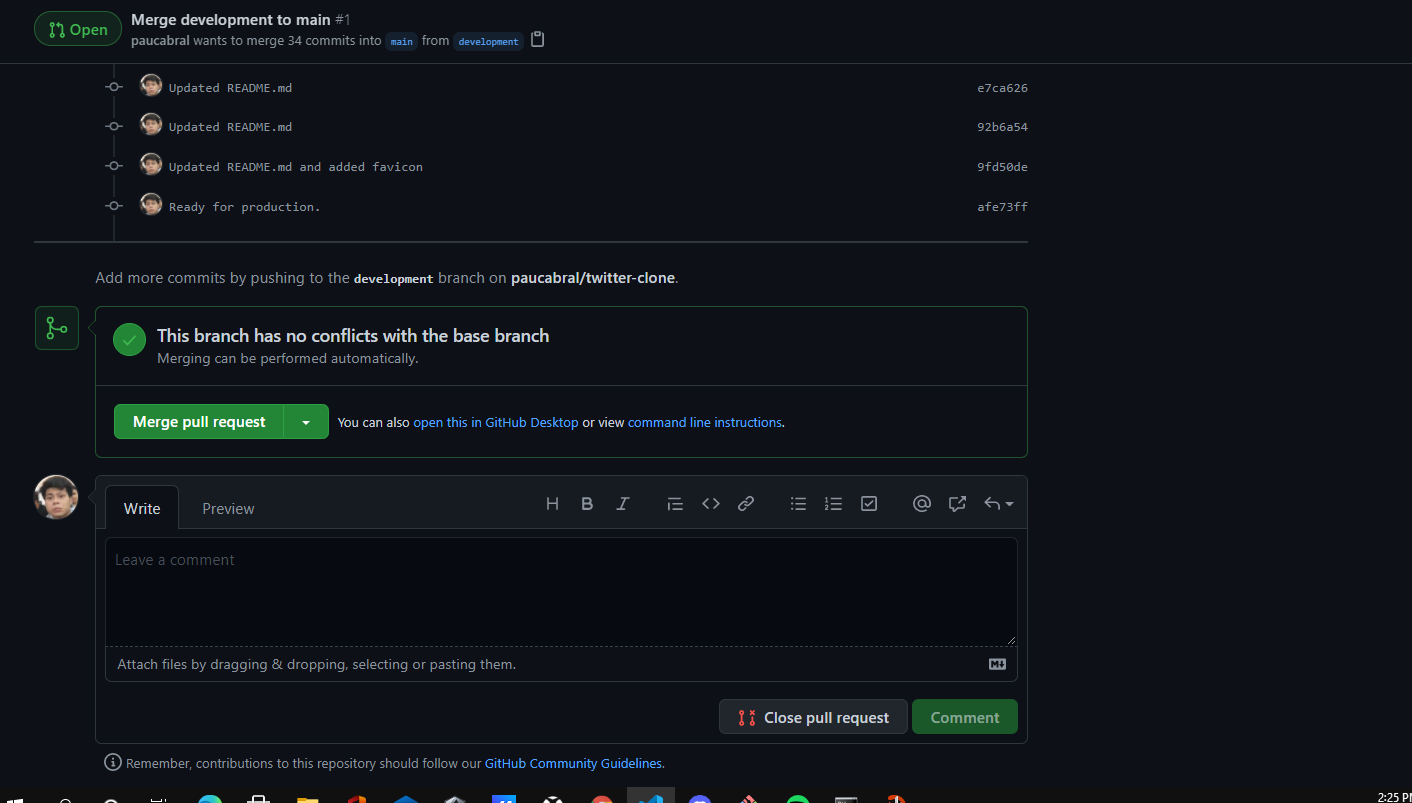
Otherwise, if your code already resides in the main branch, scroll down and select the main branch as the branch to deploy, then click the Deploy Branch button.
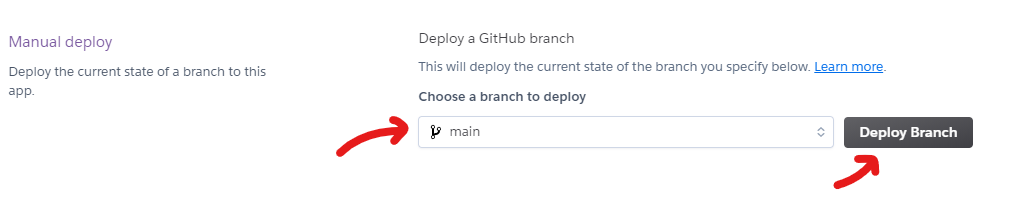
-
Head over to the Activity section of your Heroku app and check if the build has succeeded and the web application was deployed successfully.
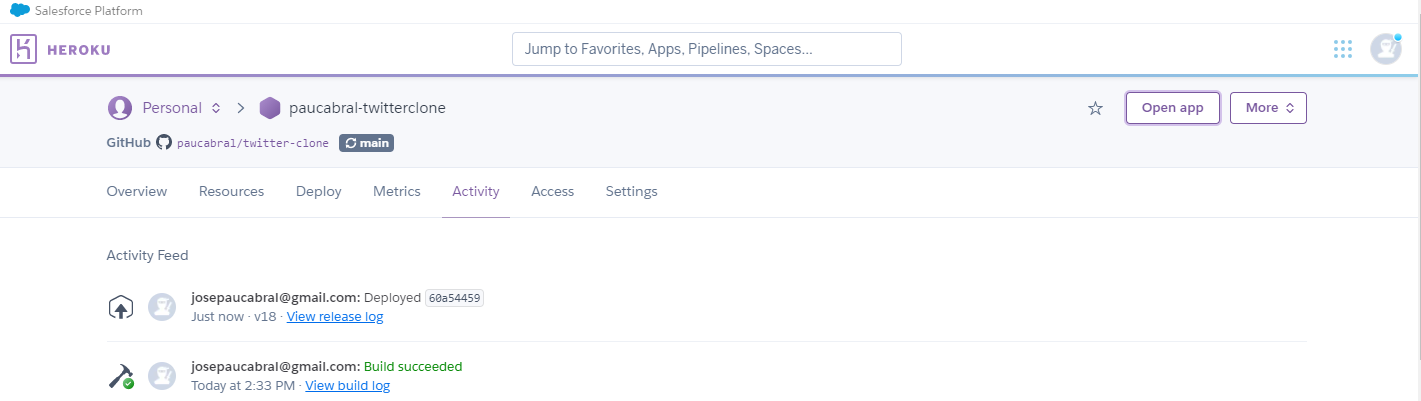
-
On a new tab, headover to your web application domain to check if it is working properly. If there are any errors, check the build logs to determine the issues.
-
Before we fully check the deployed application, we should proceed on creating a superuser first for our administrator management. Head over to your Heroku app page and select More > Run console.
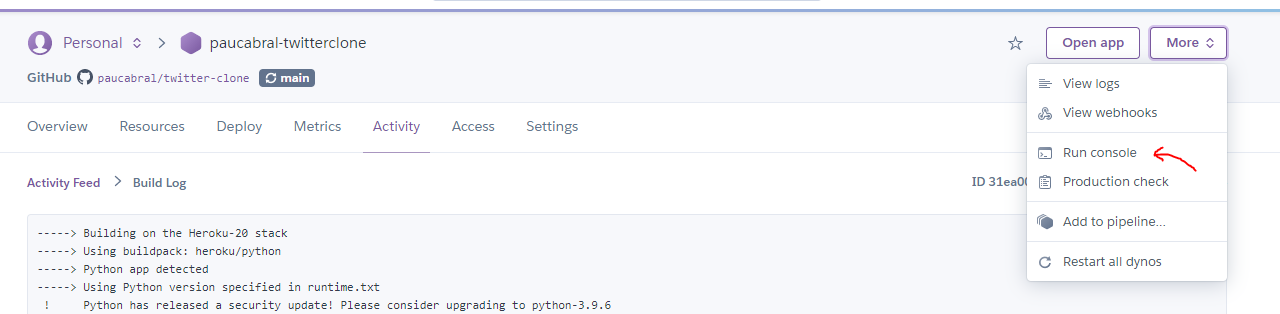
-
Type
bashthen click Run.
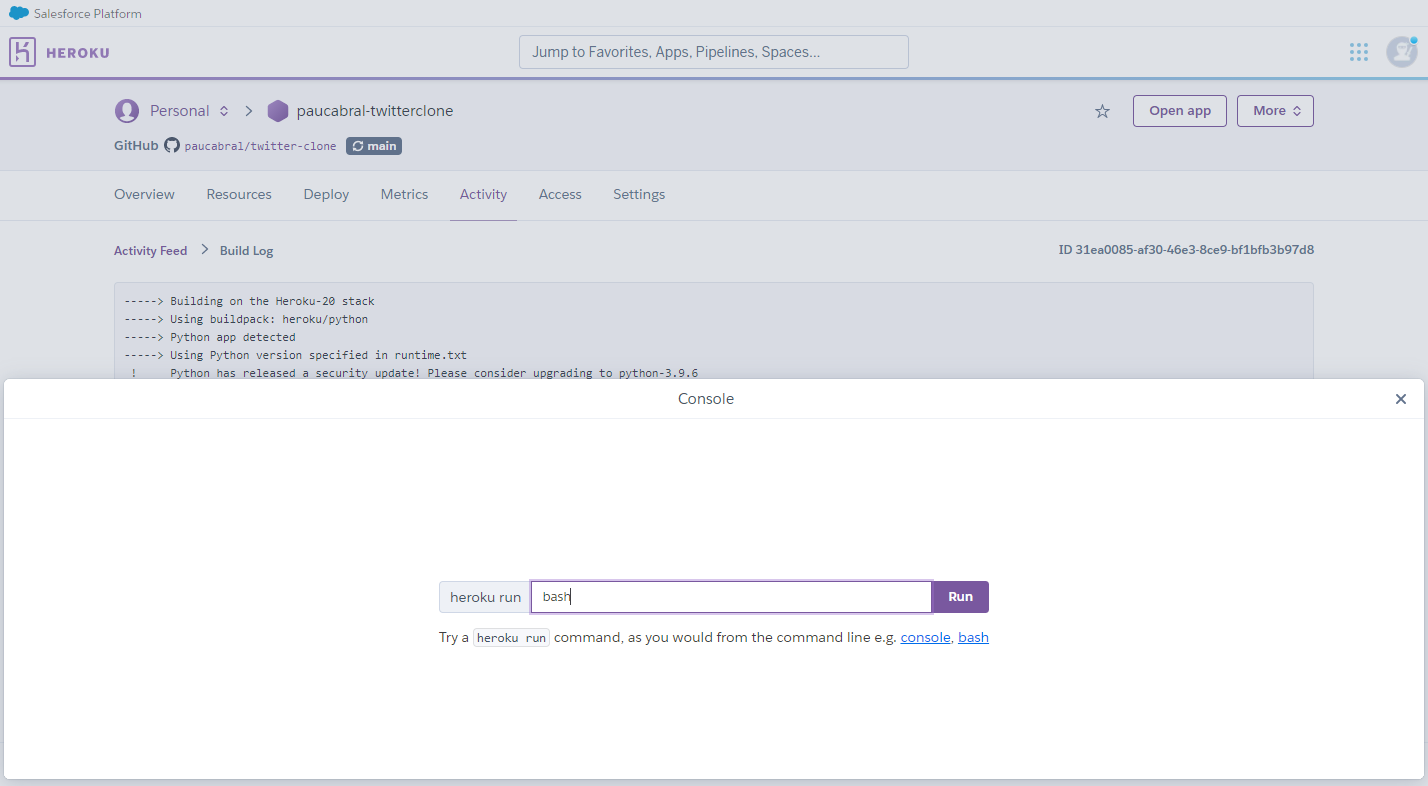
-
Issue the command
python manage.py createsuperuserand follow the prompts to create your administrator account.
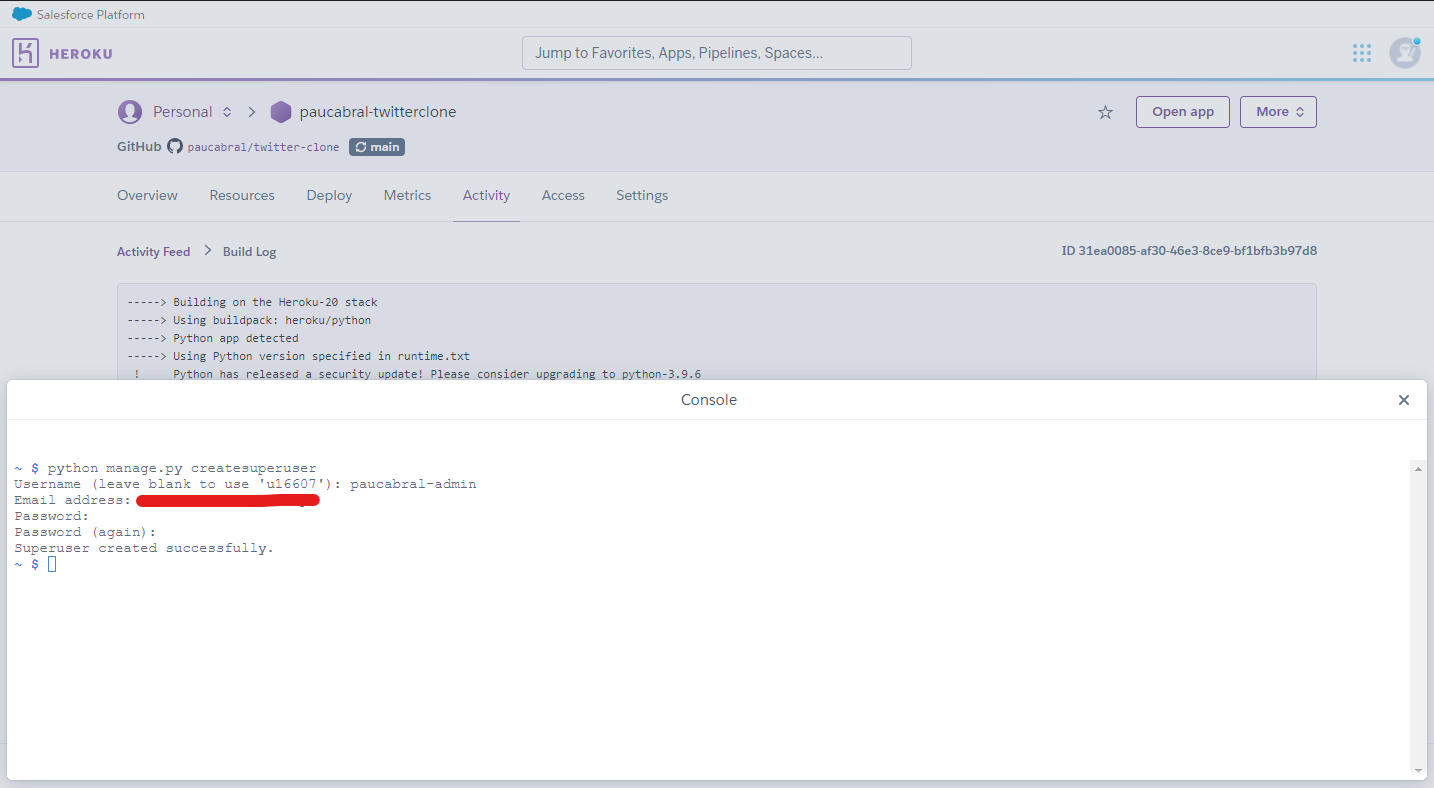
Some of the problems you might encounter
- The free tier Heroku Postgres database has a storage capacity of only 1GB and a limit of 10,000 row entries across all tables. You may need to adapt to another database provider or use paid plans if you need a bigger capacity.
- The free tier Cloudinary account on the other hand can only store up to 10GB of files. You may need to adapt to another cloud provider as well or use their paid plans for bigger capacity.
- Heroku Whitenoise is not the best solution. You may notice occassionally that files are being served slow or not at all. It is not as reliable as serving your static and media files in other cloud providers’ platform.
Nonetheless, this is a great step in learning which technology applies best for each use case.
Congratulations!
You have successfully developed and deployed your own TwitterClone.
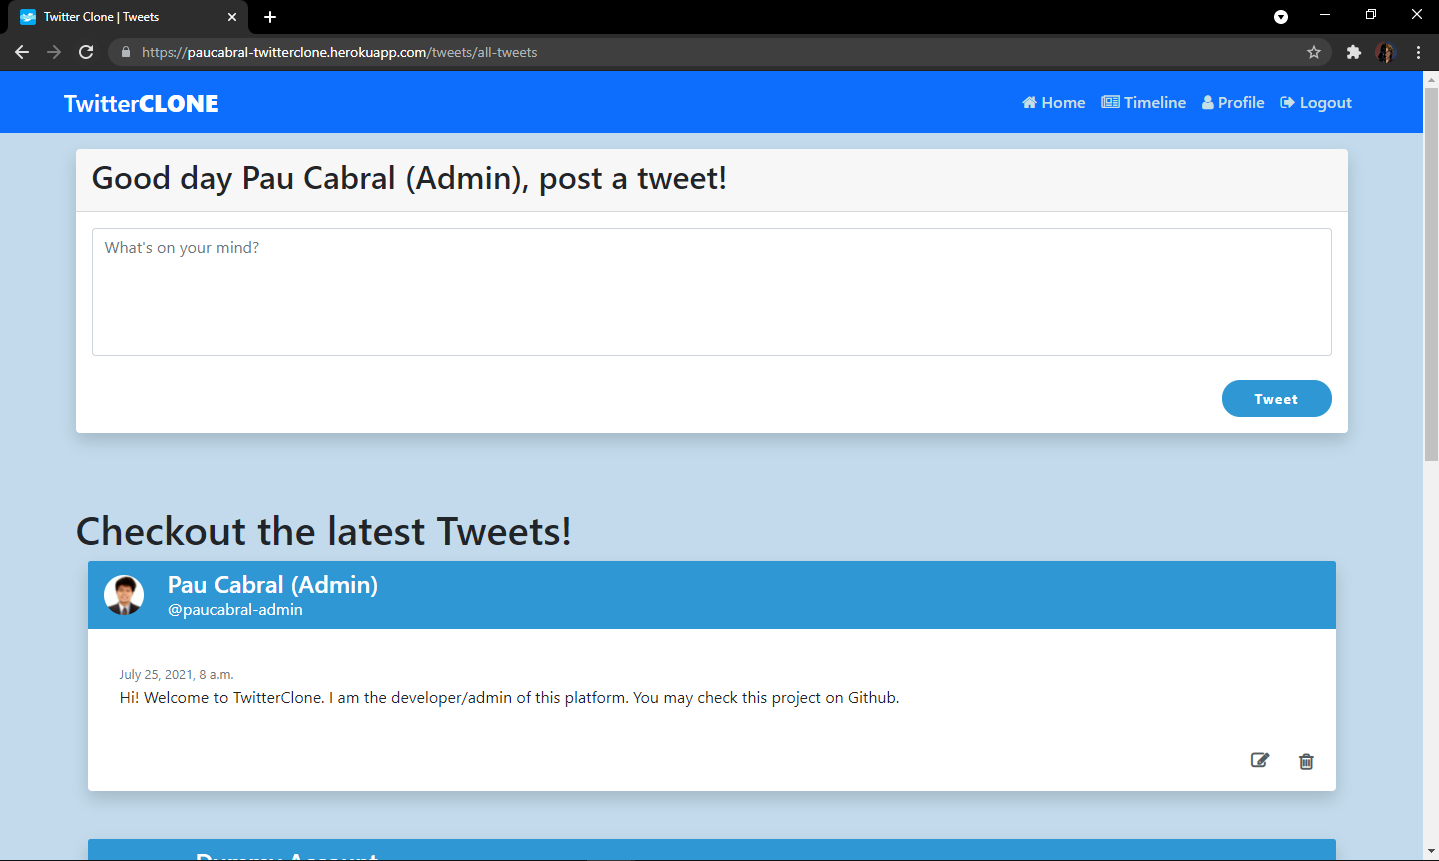
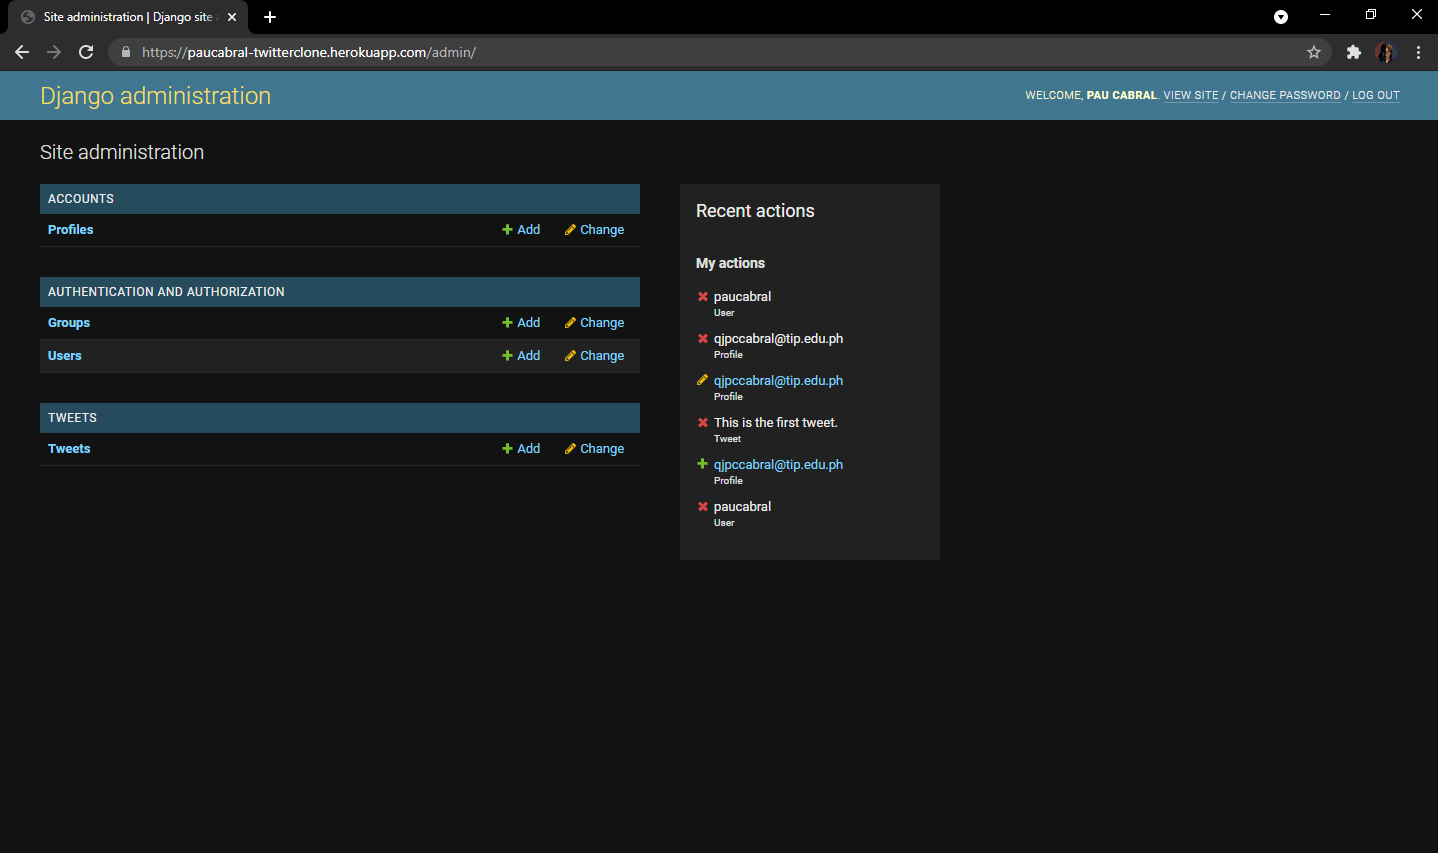